Home Blog Page 2

7 Top-Rated Places to Visit in Sandakphu

0

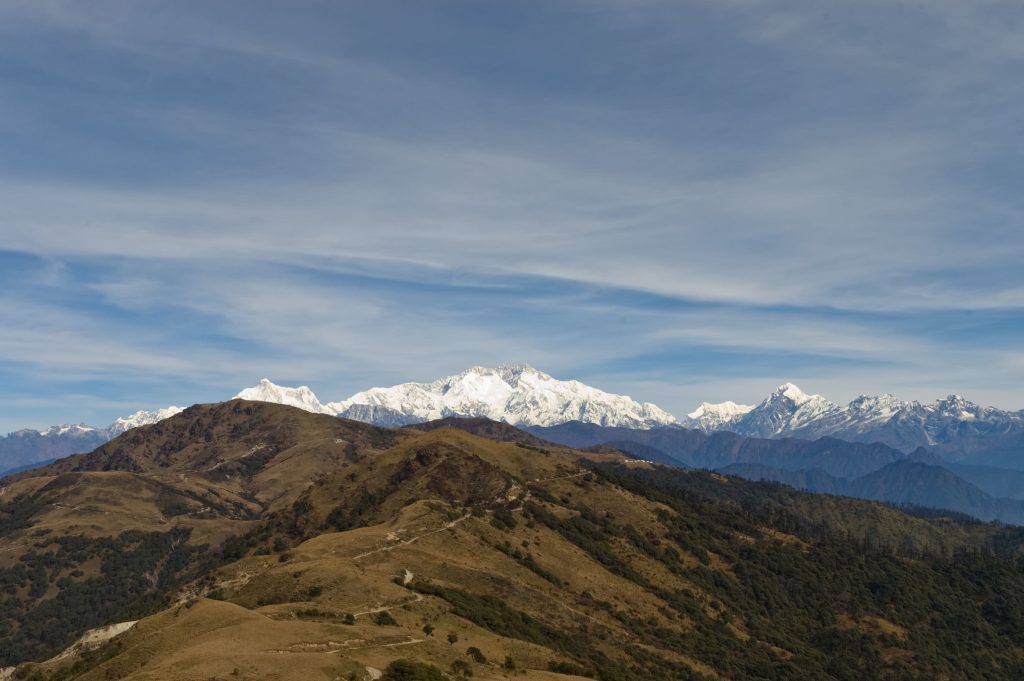
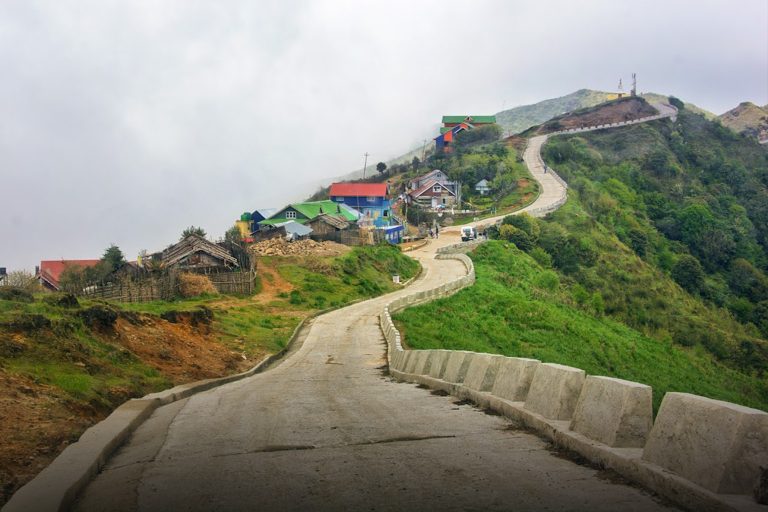
Trailing its way through the multiple monasteries and remote villages lies the highest point of West Bengal at 3636m- Sandakphu. Offering breathtaking views of some of the world’s highest peaks, Mt Everest, Mt Kanchenjunga, Lhotse, and Makalu, the Sandakphu trek is a treat to behold. The trek goes through the beautiful Singalila National Park where you can get glimpses of rare species such as the Red Pandas and the Himalayan Black bears. The landscapes encountered during the Sandakphu trek are diverse and awe-inspiring. From dense forests and verdant meadows to snow-clad peaks and panoramic sunsets, the diversity of the flora and fauna here is mesmerizing. Sandakphu is one trek you should not miss. In this blog, though, let us talk about the seven best places to visit while on the Sandakphu trek or the longer Sandakphu-Phalut trek!

Tumling

Location-wise, Tumling is situated in Nepal, but given its proximity, it is one of the most popular places for the Sandakphu trek. This quaint hamlet is full of homestays owned by Nepali Sherpas and is located pretty close to the Singalila National Park-Sandkphu checkpoint. Trekking towards Tumling comes with its scenic views; you’ll get to see diverse flora and fauna. Alternatively, if you are short on time, rent a Land Rover to get to Tumling from Manebhanjan. Just make sure that you account for the weather around the time you are trekking, as it may be fairly tricky and block the views with the fog. Also, the clear skies here offer a fantastic opportunity for stargazing and clicking the beautiful star trail pictures. Located about 19 km from Sandakphu, Tumling is also close to exciting places like Tonglu and Gairibas, which you can explore during your stay.

Tumling - Visit in Sandakphu

Tonglu

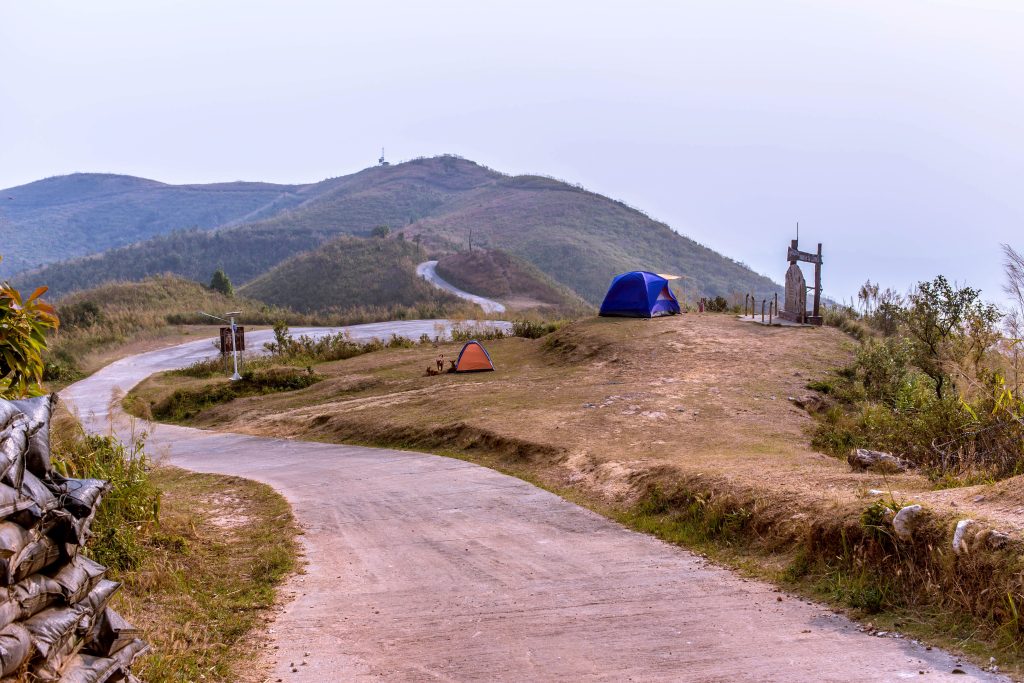
Located en route Sandakphu from Manebhanjan, Tonglu is a beautiful village in West Bengal. It’s fairly similar to Tumling when it comes to the homestays and local culture. What sets it apart is that Tonglu (at an elevation of about 3036m) is one of the many majestic peaks of the Singalila range. The climate here is reasonably cold. You will get to see a large number of rhododendron if you trek during the summer season; in winter, it will mostly be barren. You can see Mt Kanchenjunga from almost everywhere in Tonglu. If you notice carefully, you will also see the Koshi River and towns like Darjeeling and Kurseong from there. Although renting a Land Rover from Manebhanjan is a more comfortable and easy way to visit Tonglu or Sandakphu, trekking is the best way to enjoy this place’s beauty thoroughly.

Tonglu - Visit in Sandakphu

Phalut

This is an extension of the Sandakphu trek. You can either go for the Sandakphu trek or the slightly lengthier and tougher Sandakphu Phalut. Located at about 3600m above sea level, Phalut offers mesmerizing views of Mount Kanchenjunga, Everest, Lhotse, and Makalu. 

To reach Phalut, you need an entire day to trek. Although the journey is exhilarating, the trekking route to Phalut from Sandakphu is comparatively flatter, the final km is steeper. Some people take around 8 hours to get there while others take less time. 

Phalut - Visit in Sandakphu

Meghma

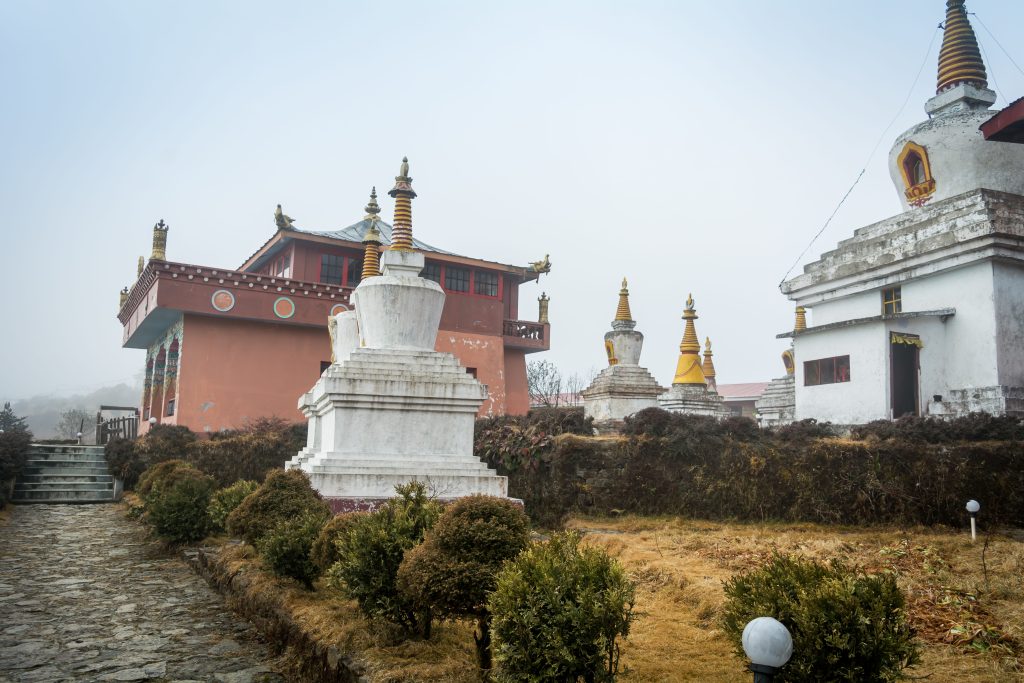
This is the place where most trekkers go for refreshments! Not that it is full of some Michelin-star restaurants, but the fact that Meghma is a stunning village with exceptionally welcoming locals makes it a fan favourite. Located at an altitude of 2899m, Meghma is just 9km from Manebhanjan. There is a Buddhist Monastery too in this region, which makes for a major attraction of this place. Just for your information, Meghma is roughly 23 km from Sandakphu.

Meghma - Visit in Sandakphu

Chitrey

While Chitrey is just 3km from Manebhanjan, this is usually the place for the first overnight stay, as the pathway to Chitrey from Manebhanjan is extremely exhausting. The trek is a steep uphill climb, after all. There is a Buddhist Monastery right in the heart of the village, an excellent place to explore. The local eateries serve some fantastic local dishes too. In addition to this, Chitrey offers a beautiful view of Mount Kanchenjunga. This site’s altitude is 2542m, so the climate here is warmer than most sites on the Sandakphu trekking route.

Chitrey - Visit in Sandakphu

Manebhanjan

Located roughly 32km from Sandakphu, Manebhanjan is the starting point of the trek. Needless to say, most people do their essential trek shopping here only. Manebhanjan is also the point where you have to get permission should you want to enter the Singalila National Park. If you want to take a car instead of trekking, your Land Rovers will also be rented from here. Given all the tourist influx, this place is extremely lively. Also, while TrekNomads will take care of all your accommodation needs, you can also choose to stay at the multiple homestays available.

Manebhanjan - Visit in Sandakphu

Srikhola

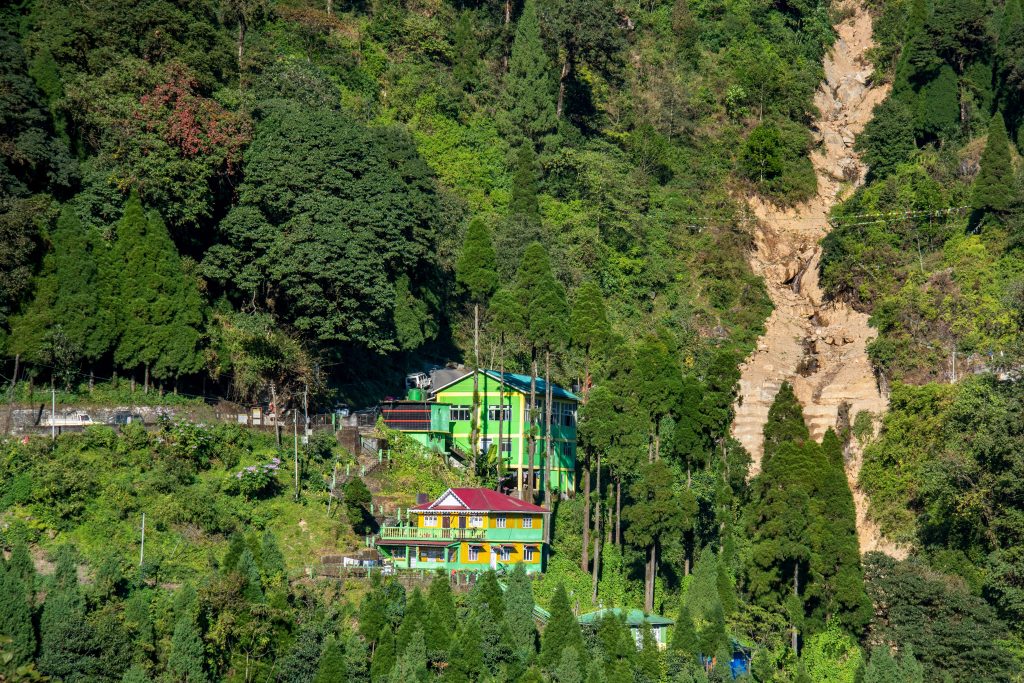
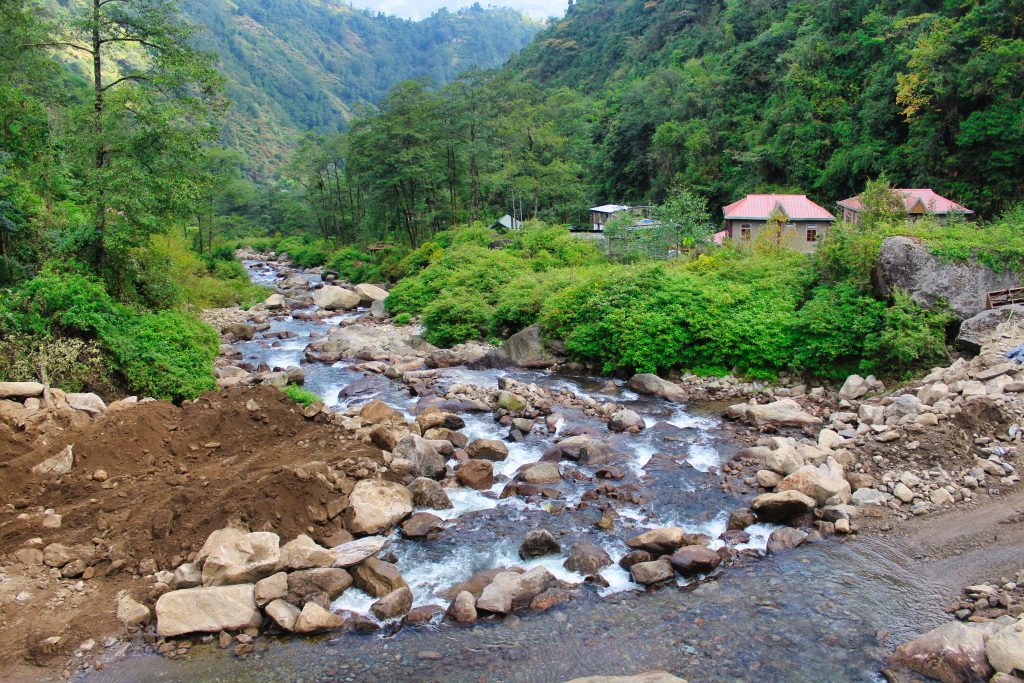
Coming to the last entrant on the list, we have Srikhola- a beautiful stop located en route to Sandakphu. Situated at 2103m above sea level, Srikhola is the place to visit while on the descent. Most trekkers visit Srikhola while descending from Phalut or Sandakphu, but you can also go there from NJP or Darjeeling. One of the main attractions of the Srikhola village is the Srikhola River located over there. The river is magnificent, and many people prefer to bathe in it. As some homestays are located there, many trekkers prefer to stay there overnight.

Srikhola - Visit in Sandakphu

While staying at Srikhola, you can also visit Singalila National Park. You can spot some wild animals over there. The entire village is surrounded by the thick alpine forest consisting of oak, birch, and fir trees. You can even sit by the river and participate in fishing.

Sandakphu is easily one of the most beautiful places in the whole wide world. While many people choose to take a jeep to the location, you can trust us when we say the trek is worth every step. Hoping this blog and the pics associated with it gave you some perspective and motivation to take this one!

Kedarkantha Trek: 10 Expert tips On What To Expect

0

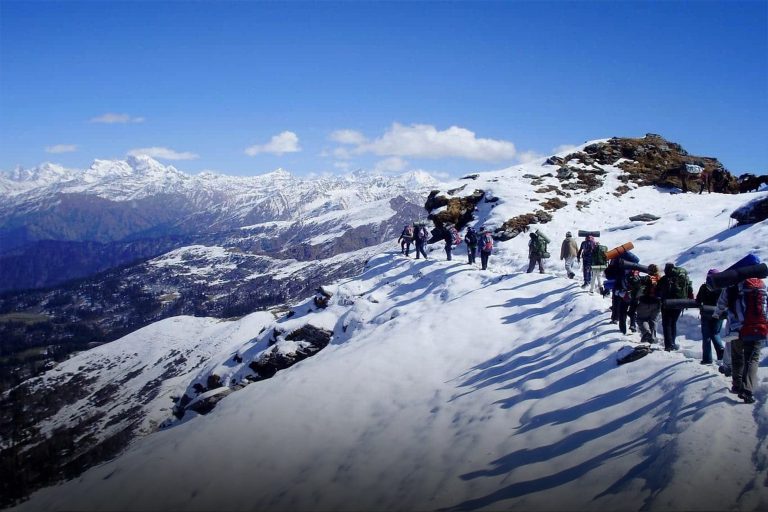
If you are here on this page, you will know much about the Kedarkantha Trek. This blog is more of a ready reckoner to put everything in perspective. Again, for the uninitiated, the Kedarkantha trek is a captivating winter trek that has been mesmerizing trekkers worldwide with its enchanting beauty and snow-capped wonders. Situated at an elevation of 3800m, the trek can be undertaken by beginners and seasoned trekkers alike. The flora here is diverse, with the forests full of oak, pine, and rhododendrons. The wildlife includes Himalayan monals, musk deer, and sometimes even elusive snow leopards. Though the Kedarkantha Trek is not technically challenging, it demands moderate fitness to conquer the occasional steep ascents and descents. However, the reward for the effort is the breathtaking 360-degree panoramic view of majestic peaks like Swargarohini, Black Peak, and Bandarpoonch from the summit. 

Having said that, here are ten expert tips on what to expect during the Kedarkantha Trek so that your trek becomes a memorable one sans any concerns:

Braving the Snowy Landscapes: 

Kedarkantha is a trek known for its snowy landscapes and beautiful snow-clad peak views. Now, we all know that it snows in winter when temperatures are extremely low. Most of us do not experience this weather in our usual lives, so it is always a good idea to be adequately prepared for the season. The preparations aren’t also much, to speak. Ensure you have enough warm and comfortable clothes, dedicated innerwear, insulation and waterproof jackets, and waterproof pants. Ensure you have enough woolen socks, gloves, and a warm beanie or hat. A balaclava or neck gaiter will also be a good thing to keep. Next comes stuff like a good quality cold-rated sleeping bag, a headlamp, spare batteries, and a hot water bag. 

Next, and probably one of the most important aspects, is your physical fitness. Make sure you do enough cardiovascular exercises and stamina-building activities so that you may train to cope with the trek’s physical demands

Braving the Snowy Landscapes - Kedarkantha Trek

Getting Ready for Camping in Cold Conditions: 

Nights on the trek are freezing; hence, you need to be well prepared. We mentioned the sleeping bag and other clothing stuff; let us prepare you mentally for the temperatures you will have to face. The nights on the Kedarkantha Trek are the coldest, with temperatures often plummeting below freezing. In lower altitudes and at campsites, nighttime temperatures can range from -5°C to -10°C (23°F to 14°F). At higher altitudes or during colder nights, temperatures can dip even lower, reaching as low as -15°C to -20°C (-5°F to -4°F) or even lower.

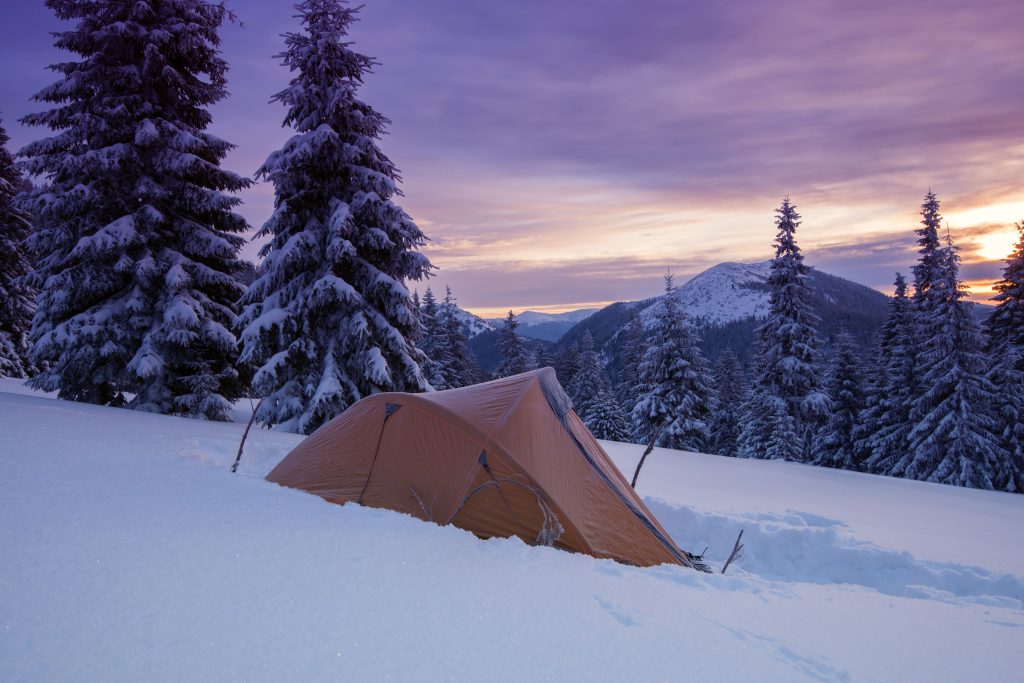
When it comes to keeping the cold away, we at TrekNomads ensure that the campsite is selected wisely to avoid exposure to strong winds or avalanches. The tents are also dome or alpine-shaped to withstand cold weather and provide shelter from the wind and snow.

In some cases, campfires may also be done to provide warmth and comfort.

Getting Ready for Camping in Cold Conditions - Kedarkantha Trek

Managing the Difficulty level

Only a little goes into managing the difficulty levels if you are prepared in advance and well. The Kedarkantha trek is a moderate-difficult trek and suitable for beginners as well. Some sections may involve steep ascents and descents, requiring good physical fitness, but that is about it. Also, the snow-covered uneven terrain can be physically demanding, so it is best to be prepared for it. The trek involves approximately 4-6 hours of walking which can be tiring for those with little trekking experience or inadequate fitness levels.

The straightforward things that can help manage this include:

  • Engage in regular physical exercise and endurance training to build stamina and strength before the trek. Cardiovascular activities like running or cycling or swimming can improve your overall fitness.
  • Arrive in Sankri or any other starting point a day or two before the trek to acclimatize to the higher altitude. Take it easy on the first day and avoid strenuous activities.
  • Dress in layers to adapt to changing weather conditions. Remove or add layers to regulate body temperature and stay comfortable during the trek.
  • Drink plenty of water to stay hydrated, even in cold weather. Consume nutritious meals and snacks to maintain energy levels during the trek.
  • Trekking poles can provide stability on uneven terrain and help reduce the impact on your knees and joints. They are particularly useful during steep ascents and descents.

Gearing up for the Sunrise

First, whenever you trek, you are usually so tired that you sleep early, and then the mornings are so bright that you will wake up early. But how about seeing the sunrise too? The beauty of the sunrise on this trek lies in its panoramic views, with a 360-degree vista of snow-capped mountains glowing in hues of pink, orange, and gold as the first rays of sunlight touch their summits. During the winter (December to February), when the trek is most popular, sunrise typically occurs between 6:30 AM and 7:00 AM. However, it’s important to note that sunrise times can change throughout the trekking season, so it’s best to confirm the exact time with your trek leader or guide.

Gearing up for the Sunrise - Kedarkantha Trek

One of the trek’s highlights is witnessing the breathtaking sunrise from the Kedarkantha Summit. Start early to reach the summit before sunrise and enjoy the mesmerizing views.

The sunrise on the Kedarkantha Trek is a truly mesmerizing and unforgettable experience. As trekkers go to the Kedarkantha Summit, they are rewarded with one of nature’s most spectacular shows—the sunrise over the majestic Himalayan peaks. 

The usual time for sunrise on the Kedarkantha Trek varies depending on the time of the year and weather conditions. To ensure you wake up in time to witness the breathtaking sunrise, follow these tips:

  • Set an Early Alarm: Before bed, set an early alarm on your watch or phone. Ensure the alarm has a loud and persistent tone to wake you up even on a chilly morning.
  • Keep Warm: Nights on the Kedarkantha Trek can be freezing, so ensure you have sufficient warm layers and a comfortable sleeping bag to keep you warm through the night. Being comfortable will help you wake up more quickly.
  • Sleep Early: Try to get a good night’s sleep and retire to your tent early. Avoid staying up too late, as exhaustion may make waking up for sunrise difficult.
  • Stay Hydrated: Drink some water before sleeping to stay hydrated. Dehydration can make it harder to wake up early in the morning.
  • Share the Excitement: Inform your trek mates and group members about the plan to witness the sunrise. The excitement and camaraderie will motivate everyone to wake up early and experience the magical sunrise together.
  • Ask for a Wake-Up Call: If you’re concerned about waking up on time, you can request a wake-up call from your trek leader or the support staff.

Proper Acclimatization: 

Proper acclimatization is crucial for any trek that involves a significant change in altitude, and the Kedarkantha Trek is no exception. It helps prevent altitude-related issues like Acute Mountain Sickness (AMS), which can be potentially dangerous and even life-threatening if not taken seriously.

Here’s why acclimatization is essential for the Kedarkantha Trek and how you can ensure proper acclimatization:

  • Altitude Gain: The Kedarkantha Trek starts from Sankri at around 2,000mabove sea level. As you ascend to higher altitudes, reaching up to approximately 3,800m at the Kedarkantha Summit, there is a significant gain in altitude over a short period. Such rapid altitude gain can lead to AMS if your body doesn’t have time to adjust.
  • Symptoms of AMS: AMS can manifest symptoms like headaches, dizziness, nausea, loss of appetite, and fatigue. In severe cases, it can progress to High Altitude Pulmonary Edema (HAPE) or High Altitude Cerebral Edema (HACE), both of which are medical emergencies.
  • Acclimatization Schedule: To ensure proper acclimatization, spending at least a day in Sankri or another lower-altitude location is recommended before starting the trek. During this rest day, gradually engage in light activities, like short walks, to help your body acclimate to the higher elevation.
  • Hydration: Staying well-hydrated is essential for acclimatization. Drink plenty of water throughout the trek to keep your body hydrated in the dry and cold mountain environment.
  • Ascend Gradually: Follow a gradual ascent profile during the trek, allowing your body enough time to adjust to the altitude. Ascending too rapidly increases the risk of AMS.
  • Listen to Your Body: How your body reacts to the altitude. If you experience any symptoms of AMS, inform your trek leader or guide immediately. Descending to a lower altitude is the most effective treatment for AMS.
  • Medical Considerations: If you have a history of altitude-related issues or certain medical conditions, consult a doctor before undertaking the trek. Some individuals may require medications like acetazolamide (Diamox) to aid in acclimatization. (If an only if there are any AMS symptoms)
  • Fitness Level: Being in good physical shape can aid in acclimatization. Engage in regular exercise and build your stamina before embarking on the trek.Proper Acclimatization - Kedarkantha Trek

Choosing the best Travel Operator that is there

We don’t even have to say this, but going with an experienced operator like TrekNomads does make all the difference. At TrekNomads, we provide knowledgeable guides, trek leaders, and support staff, making your trek safer and more enjoyable.

Here’s how TrekNomads makes your trek safer and more enjoyable:

  • Expert Guidance: TrekNomads provides knowledgeable guides and trek leaders who are well-versed in the Kedarkantha region. We have extensive experience leading treks and are familiar with the terrain, weather conditions, and potential challenges. 
  • Safety Priority: Safety is the top priority for us at TrekNomads. Our trek leaders and support staff are trained in first aid and emergency procedures, ensuring that you are in capable hands during any unforeseen circumstances. 
  • Logistical Support: We at TrekNomads take care of all the trek logistics, including permits, transportation, accommodation, and meals. This allows you to focus solely on the trekking experience without worrying about the nitty-gritty details.
  • Trek Support Staff: TrekNomads’ support staff includes cooks, porters, and helpers who take care of setting up campsites, preparing meals, and carrying heavy equipment. Their assistance lightens your load, allowing you to enjoy the trek with less physical strain.
  • Environmental Consciousness: TrekNomads emphasizes responsible trekking practices to minimize the environmental impact. We follow the principles of Leave No Trace and encourage trekkers to respect and preserve the natural beauty of the Himalayas.
  • Emergency Support: TrekNomads has established communication systems and protocols to ensure swift assistance and evacuation in emergencies or unforeseen situations.

Ensure Adequate Hydration

During the Kedarkantha Trek, water sources can become limited, particularly during the winter months when everything is frozen. The freezing temperatures can turn water sources into ice, making it challenging to access and utilize them for drinking. In such conditions, carrying sufficient water or using a thermos to keep liquids from freezing is of great help and ensures you stay hydrated throughout the trek. 

PS: If you come across a water source but are unsure of its safety, use water purification methods like boiling, using water purification tablets, or using a portable water filter to make it safe for consumption. We have a dedicated blog for the same, which you can refer to.

Resting and Sleeping Peacefully

To make your stay during the Kedarkantha Trek comfier, TrekNomads provides basic but comfortable accommodations. Here are five steps you can take to further add to it.

  • Carry a Sleeping Pad: While the provided tents and sleeping bags by TrekNomads are designed to keep you warm and comfortable, carrying an additional sleeping pad can add an extra layer of comfort. It provides insulation from the cold ground and offers more cushioning for a better night’s sleep.
  • Pack a Pillow: If you prefer sleeping with a pillow, consider carrying an inflatable or compressible camping pillow. It will support your head and neck, ensuring a more restful sleep at the campsites.
  • Personal Hygiene Kit: Bring a personal hygiene kit containing toiletries like wet wipes, hand sanitizer, and a small towel. These items will help you freshen up and feel cleaner during the trek, enhancing your comfort.
  • Portable Seat Cushion: You might sit on rocks or uneven ground during breaks and mealtimes. A portable seat cushion or lightweight foldable chair can provide extra comfort and support for your back and posture.

Remember, while these steps can make your stay comfier, it’s essential to pack smart and keep your backpack lightweight. The Kedarkantha Trek requires trekking for several days, so prioritize carrying essential items and avoid overpacking.

The Support System

Porters and mules play a crucial role in supporting treks like Kedarkantha by carrying the necessary equipment, supplies, and personal belongings of trekkers. These trekking assistants not only ease the burden on the trekkers but also contribute to the local economy by employing the region’s people. 

Treks like Kedarkantha involve walking for several days with varying terrains and altitudes. Carrying heavy backpacks can be physically demanding, especially for trekkers who need more experience. Porters and mules lighten the load, allowing trekkers to focus on enjoying the trek and the beautiful landscapes. Ensure your belongings, including personal gear and equipment, fit within the prescribed limits to prevent overloading.

Respecting what matters

You are coming to trek for a reason, and it isn’t just that you love trekking. Take the example of the garbage hills in Rabale and other surrounding areas; they are huge, but you wouldn’t want to trek on them, right? You need to breathe clean air and soak up the beauty too!

The point we are making here is that you must be conscious of your surroundings and ensure you do not litter. Follow Leave No Trace’s principles to minimize your environmental impact. Pack all your trash, including wrappers, tissues, and food waste. Dispose of waste properly at designated waste collection points.

Use Biodegradable Products: Use biodegradable toiletries and soaps to minimize pollution of water sources. Use water judiciously and avoid wastage. Turn off taps when not in use and carry reusable water bottles to minimize plastic waste. Keep noise levels low to maintain the tranquility of the surroundings and avoid disturbing wildlife. If you find any litter or non-biodegradable waste during the trek, pick it up and carry it back to proper disposal points.

By being responsible trekkers, we can ensure that pristine places like the Kedarkantha Trek remain unspoiled and continue to be enjoyed by generations. 

So, folks, that was it from our side, the ten very important points to remember when taking up the Kedarkantha Trek. Hoping this helped. Please keep sharing more, and if you feel like booking the trek now, here is the link for you!

A Comprehensive Guide to Water Purification During Trekking in the Himalayas

0

Introduction:

Trekking in the Himalayas is an exhilarating adventure, but it comes with its challenges, particularly in accessing safe drinking water. To ensure your health and well-being, it is essential to understand the importance of water purification. This comprehensive guide will walk you through the various methods of water purification during your trek in the majestic Himalayas, offering valuable insights and tips for a safe and enjoyable journey.

Recognizing the Importance of Water Purification:

Begin by understanding the significance of water purification. The Himalayas boast breathtaking landscapes, but their water sources may harbor harmful bacteria, parasites, and pollutants. Consuming untreated water can lead to waterborne diseases, debilitating and ruining your trekking experience.

Pre-Trek Planning:

Before embarking on your Himalayan trek, research the route and identify water sources along the way. Map out potential water refill points and estimate your daily water needs. This information will help you plan and carry the appropriate water purification equipment.

Water Purification Methods:

a. Boiling: 

Boiling water is the most effective and reliable method of purification. Carry a portable stove and a heat-resistant container to bring water to a rolling boil for at least one minute at lower altitudes and three minutes at higher altitudes. Boiling water is one of the oldest and most reliable methods of purifying water, especially during trekking in the Himalayas. It involves heating water to its boiling point to kill harmful microorganisms, making it safe for consumption. Here’s a more in-depth look at why boiling is an effective and essential water purification technique during your Himalayan trek:

Microbial Elimination: Boiling water effectively eliminates a wide range of harmful microorganisms, including bacteria, viruses, and protozoa. Pathogens such as E. coli, Giardia, and Cryptosporidium are commonly found in untreated water sources in the Himalayas, and boiling is highly effective in destroying them.

Accessibility and Simplicity: Boiling water is accessible and straightforward, requiring minimal equipment. A portable stove, lightweight fuel canisters, and a heat-resistant container are all you need. These items can easily fit into your backpack without adding significant weight to your load.

Independent of Water Clarity: Unlike other purification methods requiring relatively clear water to function optimally, boiling is effective regardless of water clarity. It can treat murky or sediment-laden water, which is common in natural water sources along trekking routes.

No Chemical Additives: Boiling water does not involve the use of any chemical additives, making it a natural and chemical-free way to purify water. This aspect is particularly appealing to trekkers who prefer not to introduce foreign substances into their drinking water.

Altitude Considerations: As you ascend to higher altitudes in the Himalayas, the boiling point of water decreases due to lower air pressure. At higher altitudes, the boiling point can be significantly lower than the usual 100°C (212°F) at sea level. To compensate for this, it’s essential to extend the boiling time at higher elevations. Boil water for at least three minutes at altitudes above 2,000 meters (6,562 feet) to ensure effective sterilization.

Social Aspect: Boiling water can also serve as a social activity during your trek. It allows you to gather with fellow trekkers around a campfire or stove, fostering camaraderie and creating memorable experiences as you share stories and enjoy the natural beauty of the Himalayas.
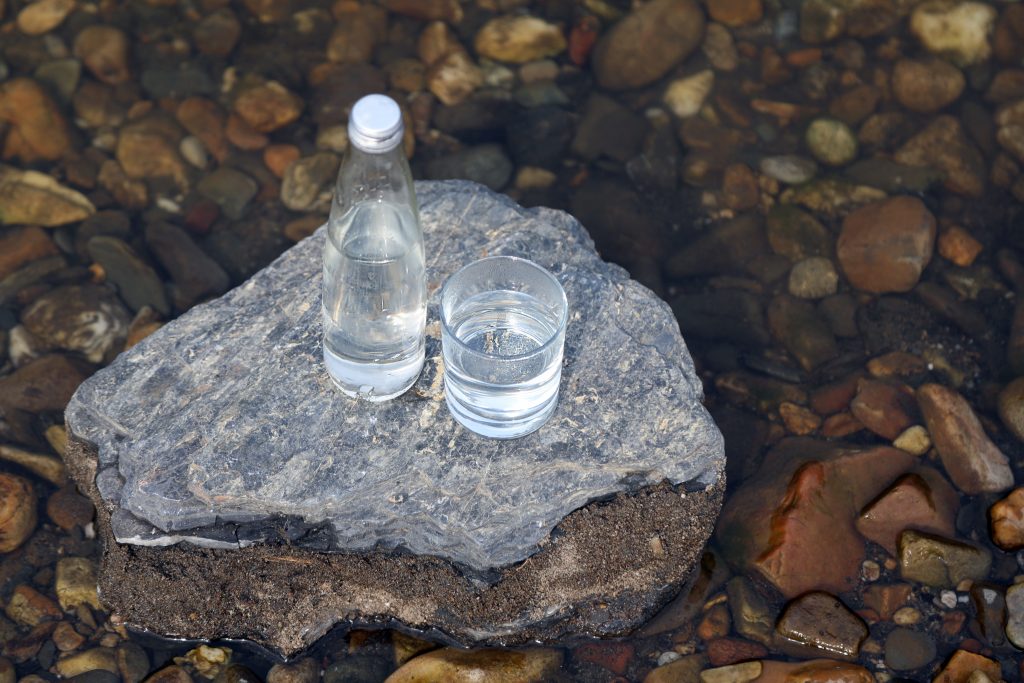
Water Purification Methods - treknomads

While boiling is highly effective, there are a few considerations to keep in mind:

Fuel Efficiency: Portable stoves require fuel, and the higher you trek, the colder the temperature. Ensure you carry enough fuel to last the duration of your trek, factoring in potential delays due to weather or other unforeseen circumstances.

Waiting for Cool Water: Boiled water needs time to cool before you can safely drink it. Plan your water consumption to avoid running out of safe water while waiting for the next batch to cool down.

In conclusion, boiling water is a tried and tested method of water purification during trekking in the Himalayas. It provides a simple, accessible, and effective way to safeguard your health and well-being, ensuring you have a memorable and safe journey through the awe-inspiring landscapes of the Himalayas. Always prioritize boiling water when purifying your drinking water during your trek.

b. Water Purification Tablets: 

Water purification tablets have gained popularity among trekkers in the Himalayas due to their lightweight, portability, and ease of use. They offer a convenient solution for treating water from various sources during your trek. Here’s a more detailed explanation of why water purification tablets are favored and how they work:

Lightweight and Portable: Every ounce in your backpack matters when trekking in the rugged terrain of the Himalayas. Water purification tablets are incredibly lightweight and compact, making them an ideal choice for trekkers looking to minimize their load. They take up very little space and can easily fit into a small pouch or pocket.

Chemical Disinfection: Water purification tablets work by releasing chemicals into the water that effectively kill or neutralize harmful microorganisms, including bacteria, viruses, and protozoa. The most common chemical agents used in these tablets are chlorine, iodine, or chlorine dioxide. These chemicals disrupt the pathogens’ cellular structures, rendering them unable to cause illness.

Effectiveness: When used correctly, water purification tablets can provide a high level of water disinfection, making the water safe for drinking. They are particularly effective against common waterborne pathogens found in natural water sources, which may pose health risks to trekkers if ingested untreated.

Simple and Quick Process: Using water purification tablets is a simple and straightforward process. Most tablets come with clear instructions for dosage and waiting time. Typically, you drop the recommended number of tablets into a specific volume of water, agitate it to ensure thorough mixing, and then wait for the required time for the chemicals to take effect.

Versatility: Water purification tablets can be used to treat various water sources, including streams, rivers, lakes, and even tap water in some cases. This versatility makes them an excellent choice for trekkers exploring remote areas with limited access to clean water.

No Equipment Required: Unlike other water purification methods that may require equipment such as filters or UV purifiers, water purification tablets do not rely on any additional tools or devices. This simplicity makes them attractive for trekkers who prefer minimalistic gear setups.

However, it’s essential to consider a few points when using water purification tablets:

Taste and Odor: Some water purification tablets can leave a slight taste or odor in the treated water due to the chemicals used. This may not be pleasant for some individuals, but the water is safe for consumption.

Waiting Time: Follow the manufacturer’s instructions regarding the required waiting time for the tablets to effectively disinfect the water. Waiting times may vary depending on the specific tablet and water temperature.

Pre-Filtering: If the water is visibly turbid or contains debris, it’s advisable to pre-filter it using a cloth or a bandana to remove large particles before adding the purification tablets. This can enhance the tablets’ effectiveness by reducing the number of contaminants they need to treat.

In conclusion, water purification tablets offer trekkers in the Himalayas a convenient and reliable method of treating water from various sources. By following the manufacturer’s instructions for dosage and waiting time, you can ensure that the tablets effectively disinfect the water, providing you with a safe and convenient water purification solution throughout your trek.

c. Water Filters and Purifiers: 

Invest in a high-quality water filter or purifier designed for outdoor use. These devices remove bacteria, protozoa, and some viruses, ensuring clean drinking water. Look for filters with a pore size of 0.2 microns or smaller for optimal protection. Investing in a high-quality water filter or purifier designed for outdoor use is highly recommended for Himalayas treks due to the following reasons:

Water Quality Assurance: Natural water sources in the Himalayas may be contaminated with various pathogens, including bacteria, protozoa, and even some viruses. A reliable water filter or purifier can effectively remove these microorganisms, ensuring that the water you drink is safe and free from harmful pathogens.

Comprehensive Protection: Water filters and purifiers offer comprehensive protection compared to other methods like boiling or chemical treatments. Boiling can kill most microorganisms but may not remove certain contaminants like sediment or chemical pollutants. Water filters with a pore size of 0.2 microns or smaller can physically block even the smallest bacteria and protozoa, providing a higher level of purification.

Convenience: Water filters and purifiers are convenient to use, especially during long treks in the Himalayas. They eliminate the need for carrying large quantities of fuel for boiling or the extra weight of water purification tablets. With a filter or purifier, you can collect water from natural sources along the way and have clean drinking water on demand without much effort.

Taste and Odour Improvement: Unlike chemical treatments that can leave a noticeable taste or odour, water filters and purifiers do not alter the taste of the water. This is especially appealing for trekkers who prefer the natural taste of water without any chemical aftertaste.

Environmental Impact: Water filters and purifiers are environmentally friendly as they do not require fuel burning or chemical-treated water disposal. Using a filter minimizes your ecological footprint and contributes to preserving the pristine environment of the Himalayas.

Health Benefits: Consuming clean and safe water is crucial for maintaining good health during a physically demanding trek. Waterborne illnesses can lead to dehydration, and weakness, and potentially ruin the entire trekking experience. A high-quality water filter or purifier can help prevent these issues and ensure you stay healthy and energized throughout your journey.

However, there are some considerations to keep in mind:

Initial Investment: High-quality water filters and purifiers designed for outdoor use can be more expensive upfront than other purification methods. However, they often offer better durability and long-term performance, making them a worthwhile investment for frequent trekkers or adventurers.

Maintenance: Water filters and purifiers require periodic maintenance, such as cleaning and replacing filter elements. It’s essential to follow the manufacturer’s guidelines and carry any necessary spare parts to ensure the device functions optimally throughout your trek.

Filter Clogging: In particularly turbid water sources, filters may clog faster, reducing their flow rate and efficiency. In such situations, pre-filtering the water through a cloth or bandana can help extend the life of the filter.

In conclusion, investing in a high-quality water filter or purifier designed for outdoor use is highly beneficial for Himalayas treks. These devices provide reliable and comprehensive water purification, ensuring that you have access to clean and safe drinking water throughout your journey. Look for filters with a pore size of 0.2 microns or smaller for optimal protection, and be sure to maintain and care for the filter properly to maximize its effectiveness and lifespan.

d. UV Sterilization: 

UV water purifiers use ultraviolet light to neutralize harmful microorganisms. They are lightweight and easy to operate, but they rely on batteries, so carry spares and ensure they are fully charged before your trek. UV water purifiers are an effective and convenient method of water purification during Himalayan treks. These devices utilize ultraviolet light to neutralize harmful microorganisms, providing trekkers with clean and safe drinking water. Here’s a more detailed explanation of the usage of UV water purifiers during Himalayan treks:

Ultraviolet (UV) Water Purification Technology: UV water purifiers work by emitting ultraviolet light at a specific wavelength (typically around 254 nanometers). When water is exposed to this UV light, it damages the DNA of microorganisms like bacteria, viruses, and protozoa, rendering them unable to reproduce and cause illness. The process is quick and efficient, making the water safe for consumption within seconds.

Lightweight and Portable: One of the significant advantages of UV water purifiers is their lightweight and compact design. They are specifically designed for outdoor use and are favored by trekkers due to their portability. UV purifiers can easily fit into a backpack without adding much weight, making them a practical choice for those seeking to travel light during their Himalayan trek.

Ease of Operation: Using a UV water purifier is simple and user-friendly. Most UV purifiers have a straightforward interface with a single button to activate the UV light. Trekkers need to immerse the purifier into the water and press the button to start the purification process. Some devices also come with indicators or screens to show when the purification is complete.

Fast Purification Process: UV water purifiers provide rapid water purification, usually taking only 60 seconds to a few minutes to treat a single liter of water. This speed is advantageous for trekkers who may need to hydrate quickly or refill their water bottles during short breaks.

Battery Reliance: A key consideration when using a UV water purifier is its reliance on batteries. Trekkers must carry spare batteries and ensure they are fully charged before embarking on the trek. Depending on the model and battery capacity, a single set of batteries can last for a considerable number of water treatments, but having backups is essential, especially for longer treks.

Water Clarity: UV water purifiers are most effective when used in clear or relatively clear water. Particles and sediment in turbid water can reduce the efficiency of the UV light, potentially leaving some microorganisms untreated. If using a UV purifier with murky water, it’s advisable to pre-filter the water through a cloth or bandana to remove larger particles.
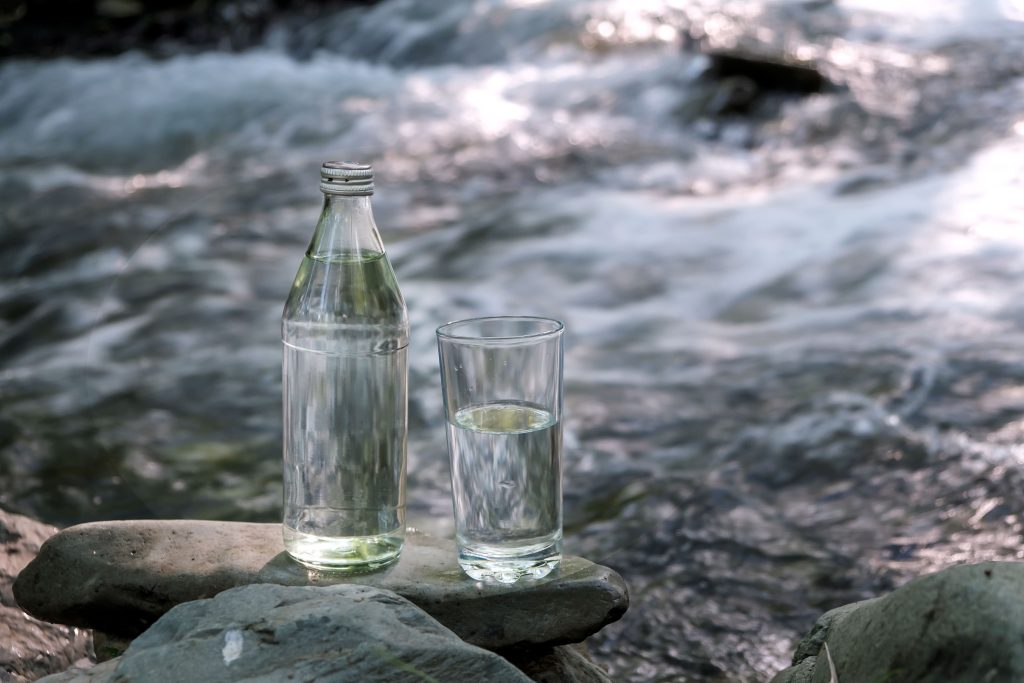
Water Conservation while Purifying Your Water

However, there are some considerations to keep in mind:

While UV water purifiers are excellent for neutralizing microorganisms, they do not remove sediment, chemicals, or other contaminants from the water. If the water source is known to contain chemical pollutants or heavy metals, it’s best to combine UV purification with another method like filtering or chemical treatment for more comprehensive water purification.

In conclusion, UV water purifiers are a reliable and efficient water purification method during Himalayan treks. Their lightweight, easy operation, and fast purification process make them popular for trekkers seeking safe drinking water without carrying excessive gear. However, always ensure you have spare batteries and consider pre-filtering if the water source is visibly turbid. With proper usage and preparation, UV water purifiers can significantly contribute to a successful and enjoyable trekking experience in the breathtaking landscapes of the Himalayas.

Water Conservation while Purifying Your Water

In remote Himalayan regions, water sources may be scarce. Conserve water whenever possible by using it efficiently for drinking and cooking purposes. Avoid wasting water during purification processes. When undertaking water purification methods during treks in the Himalayas, it is crucial to ensure minimal water wastage for several reasons, including the water scarcity in the region and the challenging living conditions faced by Himalayan dwellers.

Scarcity of Water in the Himalayas:

The Himalayas are known for their magnificent beauty but are also a region of water scarcity. Despite being the source of many major rivers, water availability can be limited due to several factors:

  1. Melting Glaciers: The Himalayan region is home to numerous glaciers that act as significant water reservoirs. However, due to climate change, many of these glaciers are retreating, affecting the regular flow of rivers and streams.
  2. Seasonal Variation: The Himalayas experience extreme seasonal variations, with wet monsoons and dry winters. During the dry months, water sources may dwindle, leaving trekkers with fewer options for accessing clean water.
  3. Remote Locations: Many trekking routes in the Himalayas lead through remote and high-altitude regions where water sources may be scarce or distant, requiring careful planning and conservation.

The Struggle of Himalayan Dwellers:

Life for the people living in the Himalayas is challenging, especially for those residing in remote villages or high-altitude regions. These dwellers often face the following difficulties related to water:

  1. Long Distances: Some Himalayan dwellers have to walk long distances to collect water from the nearest water source, which could be hours away. Water scarcity can become acute in these regions, particularly during dry seasons.
  2. Dependence on Nature: Himalayan communities heavily depend on natural water sources for their daily needs, including drinking, cooking, and agriculture. Any disruption in the availability or contamination of water can have severe consequences on their livelihoods.
  3. Waterborne Diseases: Inadequate access to clean water puts Himalayan dwellers at risk of waterborne diseases, leading to health issues and economic burdens on already marginalized communities.

Considering these challenges faced by both trekkers and Himalayan dwellers, it becomes essential to minimize water wastage during water purification methods on treks. Here are some tips to ensure responsible water usage:

Plan Ahead: Before embarking on a trek, research the availability of water sources along the route and carry enough water purification equipment to minimize the need for excessive water collection.

Filter and Store Water: Instead of purifying water in small batches, filter and store larger quantities of water when you come across a reliable water source. This way, you reduce the frequency of water purification and the associated water wastage.

Educate Trekkers: Raise awareness among fellow trekkers about the importance of conserving water during the journey. Encourage responsible practices, such as using water purification tablets efficiently and avoiding unnecessary wastage.

Respect Local Practices: When passing through Himalayan villages, respect the locals’ water usage practices and refrain from depleting their water resources.

Minimize Water for Cleaning: During trekking, use water efficiently for personal hygiene and cleaning, especially if water is scarce in the area.

By being mindful of water usage and avoiding wastage, trekkers can help preserve this precious resource for themselves and the Himalayan communities, contributing to the sustainability and preservation of this breathtaking region.

Conclusion:

Safe drinking water is crucial for a successful and enjoyable trekking experience in the Himalayas. By understanding the various water purification methods, planning ahead, and practising responsible water usage, you can safeguard your health and fully immerse yourself in the awe-inspiring beauty of the Himalayas. Prioritize water purification, and your journey through these majestic mountains will be both safe and unforgettable.

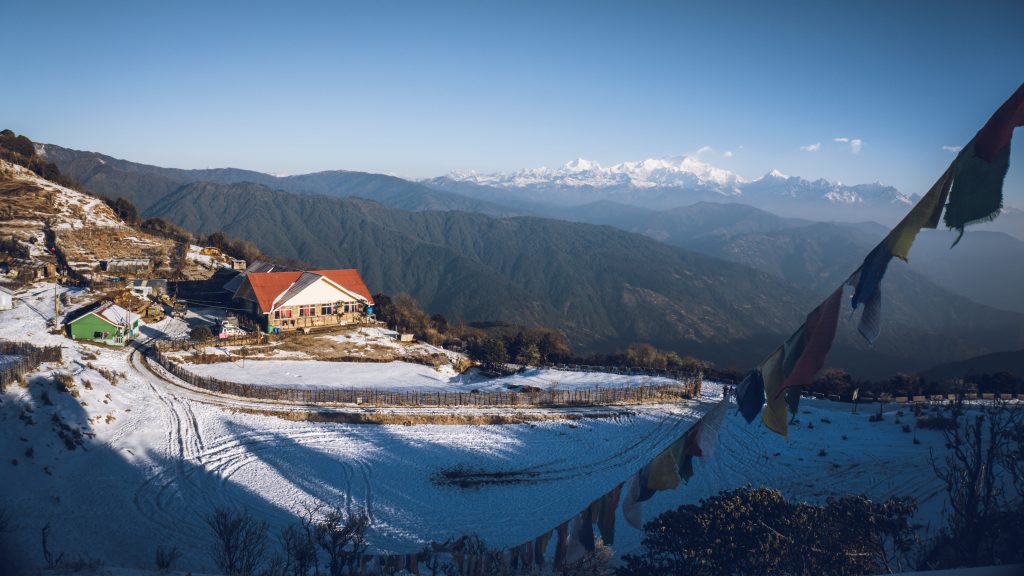
Fansipan’s Seasonal Splendors: Best Time to Visit and What to Expect

0

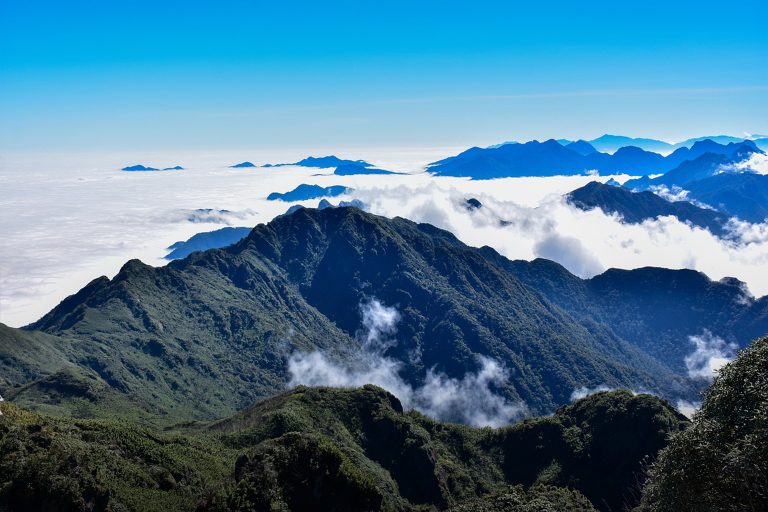
Best Time to Visit and What to Expect - treknomads

I. Introduction

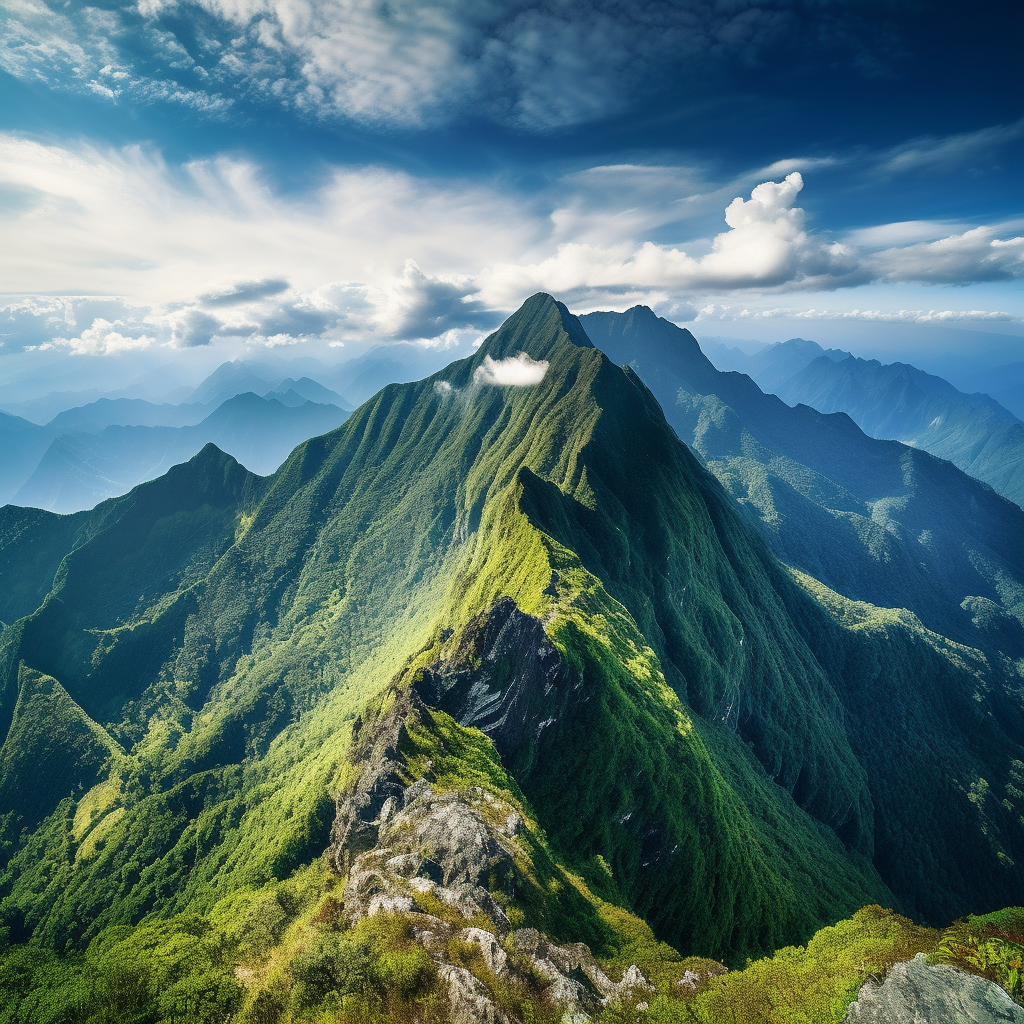
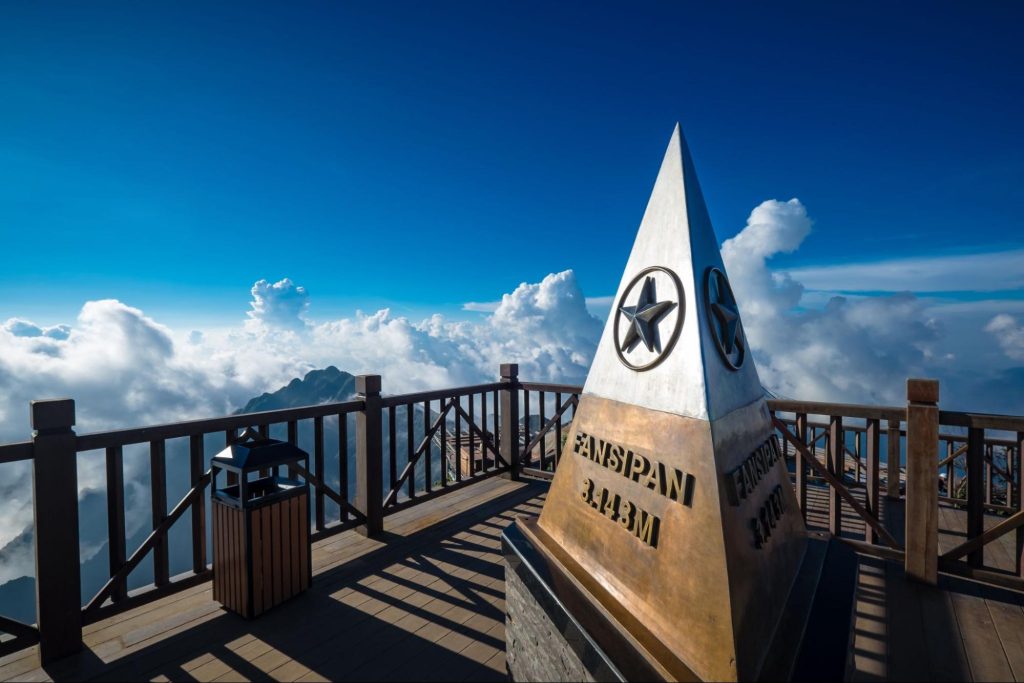
The trek up Fansipan Mountain is something you’ll always remember. It is the highest mountain in Vietnam’s Hoang Lien Son Mountains at 10,326 ft (3,147 m). Fansipan Mountain holds the distinction of being the highest peak in the Indo-China Peninsula, making it an in-demand destination for trekkers and nature enthusiasts seeking to climb the majestic heights of this iconic landmark. Since the beginning of time, Fansipan has been an attraction for adventure lovers worldwide who want to see its unmatched beauty and how strong they are on its rugged terrain. Find out the best time to go to Fansipan, and you’ll be able to enter a world of natural beauty and exciting adventures that can’t be found anywhere else. Fansipan’s hills, valleys, and coloured views are stunning, but only if you go at the right time of year. This is true whether you want to go hiking, take photos, or sit back and enjoy the view.

II. During different seasons

Before going to Fansipan, travellers are strongly advised to check the area’s weather. The trek will be much more challenging if the weather isn’t good throughout the trip. If it rains along the way, making the ground slippery and muddy, a trek could become dangerous and unpleasant. If it doesn’t rain, but the sky is cloudy, you can’t see the beautiful views of Sapa from above. Find out what the weather is like in Fansipan before you go if you want to have a good time there. 

During different seasons - Treknomads

III. Season 1: Springtime Delights

Early March marks the start of spring, which lasts until May. In these months the weather will be warmer and more pleasant than in the winter. The average temperature during the springtime is 15-25°C. This makes it the best time to trek because everything looks greener. When the weather is just suitable for hiking—not too hot and not too cold—you can see the best views in the mountains. The sky will be clear, and the light will be perfect for taking pictures.

In addition to the nice weather and green surroundings, this time of year is also great because it is cherry blossom season. If you visit during this time of year, the valleys, hillsides, and slopes of the nearby mountains and the roads in the town of Sapa are all covered in beautiful blossoms. You can easily keep up with the peach blossoms, azaleas, pure, fragile white plum flowers, and bright climbing roses. You can see big sloped rice fields with farmers tending to the green rice seed between March and May. Spring is a great time to visit Sapa and go hiking, trekking, mountain climbing, and visiting Fansipan mountain because of the beautiful mountainous environment covered in hazy fog and the comfortable weather. 

At this time of year, Sapa has several festivals that show off the different ethnic traditions of the area. The Hmong “Gau Tao” festival and the Giay “Roong Pooc” festival are examples of these events. Each of the Sapa people’s festivals celebrates a different part of their long cultural past. Also, one of the best parts of your trip will be visiting early spring markets like the Sapa market, Can Cau Simacai market, Bac Ha market, and Coc Ly market. 

 Springtime Delights - Treknomads

IV. Season 2: Summer Escapades

The weather may get warmer during the summer months of June, July, and August. There are times when it’s 26°C outside. Even if it only rains for a few hours, it will be so strong that dirt roads and tracks will quickly become muddy. Trekking in Sapa is not something you can enjoy due to the heat or the rain. Even so, the summer months are excellent, and rice fields are busy growing crops. During and right after the rainy season, when there is still a lot of water rushing down the mountainsides,  waterfalls are at their most beautiful. Because of this, you can enjoy beautiful views all year, not just in the summer. You can swim in an outdoor pool or boat in the natural lagoon of Lan Ha Bay and Ba Trai Dao. At this spot, you can do one of these things. You can also relax on the sundeck and look up at the stars; there is even a squid fishing session for you to enjoy. 

Summer Escapades - Treknomads

V. Season 3: Autumn Bliss

As September continues and the amount of rain continues to go down, trekking and other outdoor activities become more accessible and more enjoyable. Also, September and October are the months when crops are harvested. You can expect an average temperature of 21°C during these months.

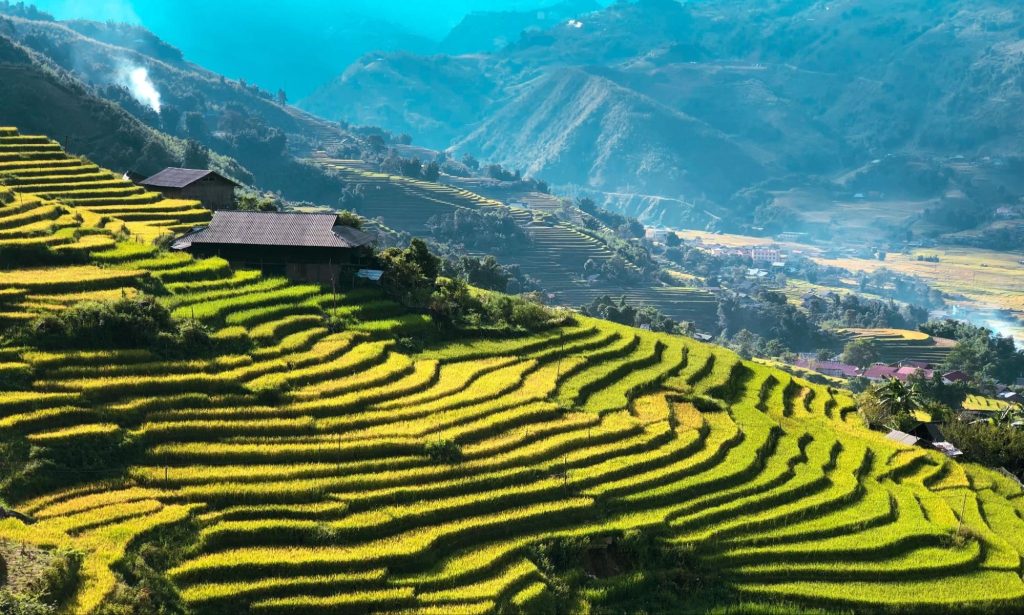
Sapa is one of the most popular tourist spots in the world because it has beautiful views of tiered rice fields at different stages of growth. If you go past the town, you’ll come to a place with beautiful green fields and mountains. Some of the best places to visit are Ta Van, Lao Chai, Ban Den, and Ta Phin if you want to see golden terrace fields that farmers pick after a hard time ploughing. In Sapa, a thin layer of dew covers the scenery in the early morning, giving it a shimmering sheen and a calm feeling. One of the best things about living the perfect life in Sapa is walking in the early autumn frost and enjoying the beautiful views. 

The Then ritual, one of the most important traditions carried out by the local people of Sapa, is held in August, according to the lunar calendar. The local Sapa people celebrate it to honour their ancestors, remember the harvest from the year before, and hope for good weather and a big yield. When you visit Sapa at this time, you will have the opportunity to fully absorb yourself in the lively atmosphere of the local people. Once again, the weather is perfect for trekking. The roads are also easier to use and safer for bikers, making it a great place to go on a trip. As the clouds move by, they show how beautiful Fansipan is. You can see a beautiful belt of clouds below you from the top. Sapa’s otherworldly beauty can sometimes be seen through breaks in the clouds. 

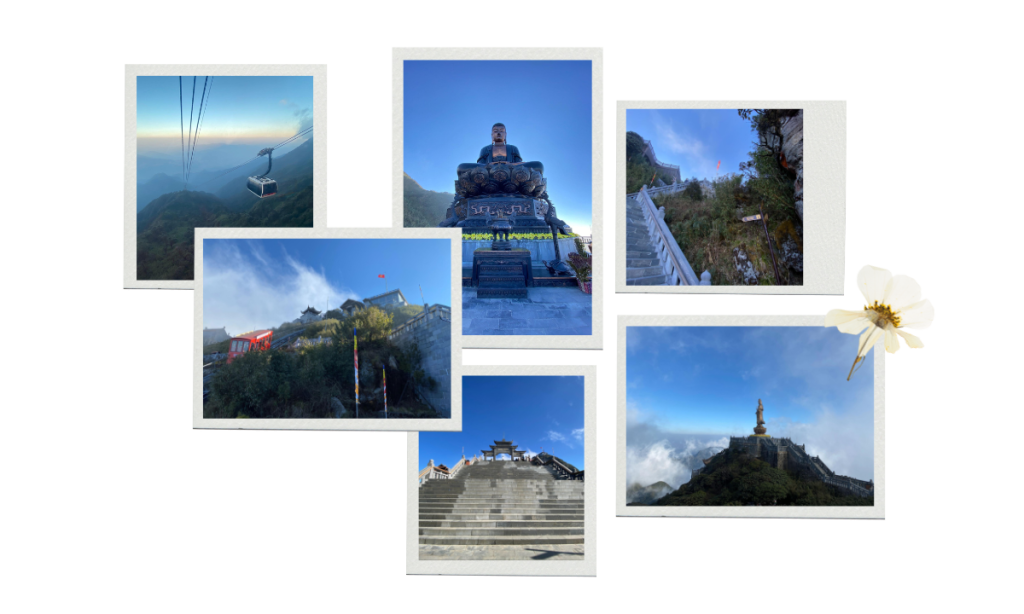
Moreover, Fansipan has become easier to conquer with the installation of cable cars. This made it easy for trekkers to take the trek up and cable car down for the descent. Treknomads will provide the cable car ride back to Sapa Village as the trekkers get to experience the thrill and challenge of the trek while also enjoying the convenience and serene scenes of the descent.

Autumn Bliss - Trekknomads

VI. Season 4: Winter Wonderland

Winter starts in the month of December and extends until February. Fansipan is magnificent in the winter when the temperature drops below -9 °C, even though everything freezes in that cold. The top of Fansipan is covered in snow, which sparkles in the sun. If you are in Sapa in the winter, take the time to visit the Sapa Stone Church, Cat Cat Village, Ham Rong Mountain, and Fansipan Mountain. These places look especially beautiful during the winter months, especially when there is snow on the ground. Fansipan Mountain is the place to go in the winter if you want to do exciting things in the snow. Fansipan is a great place to go for a winter vacation because there are many winter sports, from skiing to sledging. 

Fansipan is a great mountain for skiers and snowboarders, so you will be satisfied if you plan to hit the slopes. Put on snowshoes and trek through the snowy scenery to better view the peak. Whether you’re a beginner or an old pro, it’s easy to find terrain parks and runs that fit your skill level. Tubing or sledding down one of Fansipan’s many hills is just as exciting. You could take your trip to the next level by riding a sledge around the mountain. This sounds like an exciting journey. You can get help from workers who have done this before. You can still keep up with Sapa’s busy pace of life despite the city’s cold weather temperature. There are a lot of shops here that sell everything from fabric and shoes to trinkets and gifts. 

Winter Wonderland - Trekknomads

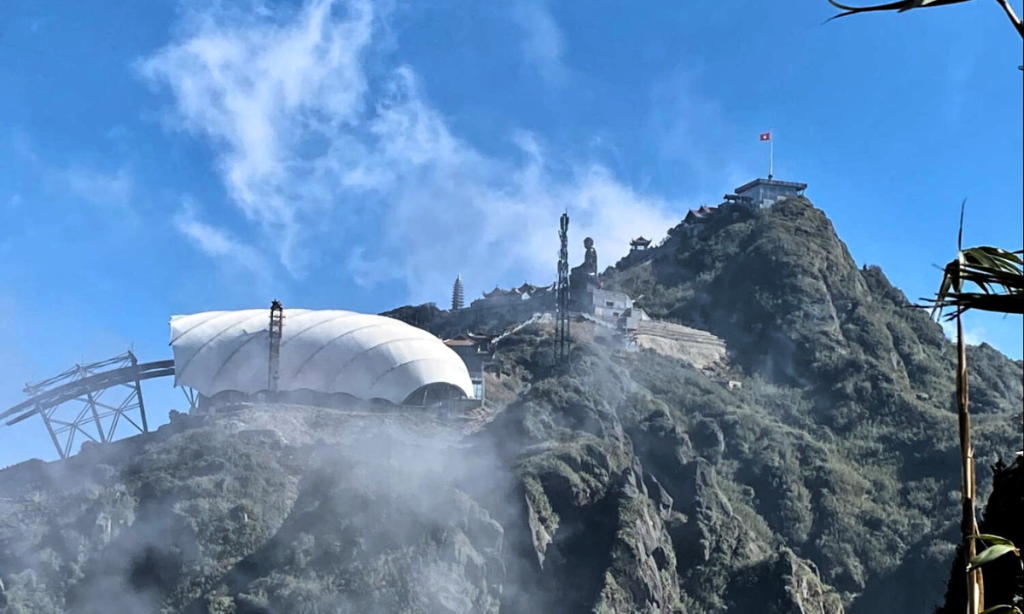
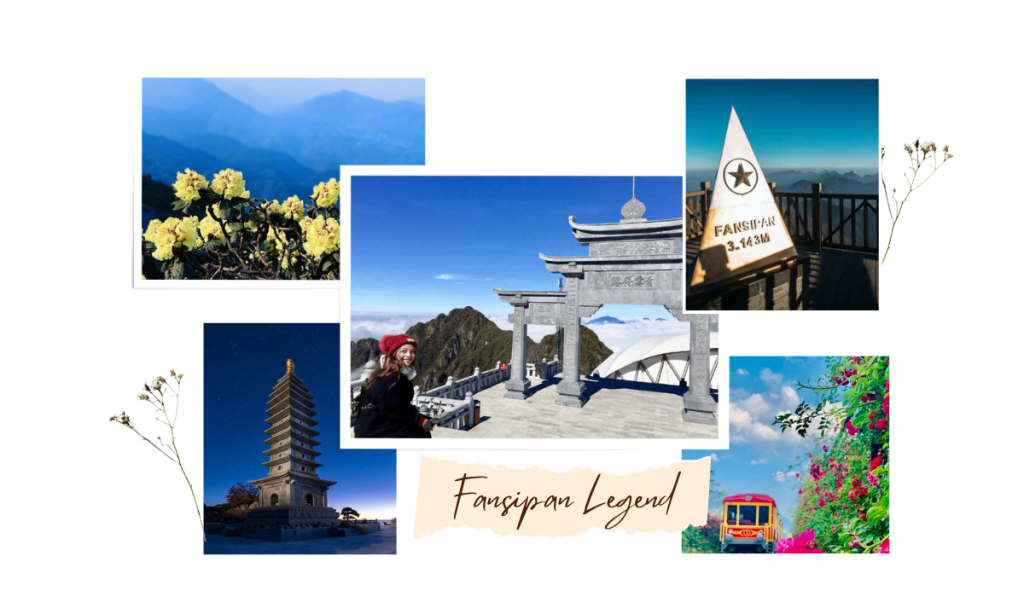
Fansipan Legend is a magnificent complex developed by Sun Group, offering a delightful fusion of cultural tourism, entertainment, and resort projects. Nestled amidst the awe-inspiring landscapes of Fansipan Mountain in Vietnam, this destination exudes a captivating charm from an aerial perspective. As you soar above, you’ll be treated to a breathtaking view of architectural wonders harmoniously blending with the surrounding natural splendour. The sprawling resort, adorned with opulent amenities, creates a haven of relaxation and indulgence. The vibrant cultural village springs to life, showcasing traditional arts and performances that immerse visitors in the region’s rich heritage. With its enchanting aerial vista, Fansipan Legend beckons adventurers and culture enthusiasts alike, promising an extraordinary journey that celebrates the beauty of nature and the allure of Vietnamese traditions.

Fansipan Legend - Trekknomads

 Fansipan Mountain - Trekknomads

VII. Conclusion

People often say that the temperature on Fansipan Mountain is tricky to predict. The temperature can reach 26°C in the summer, but it can drop to a freezing -9°C in the winter! This means that hiking is always a good idea. Before going outside, you should ensure you are ready for whatever surprises mother nature may have. Because there is a lot of wildlife in the area, you should keep your wits about you and be ready for anything. You must definitely experience the mesmerizing Mt. Fansipan once in your life. 

Scaling New Heights: Why Kang Yatse II Should be your first ever 6000m Expedition in the Himalayas

0

I. Introduction

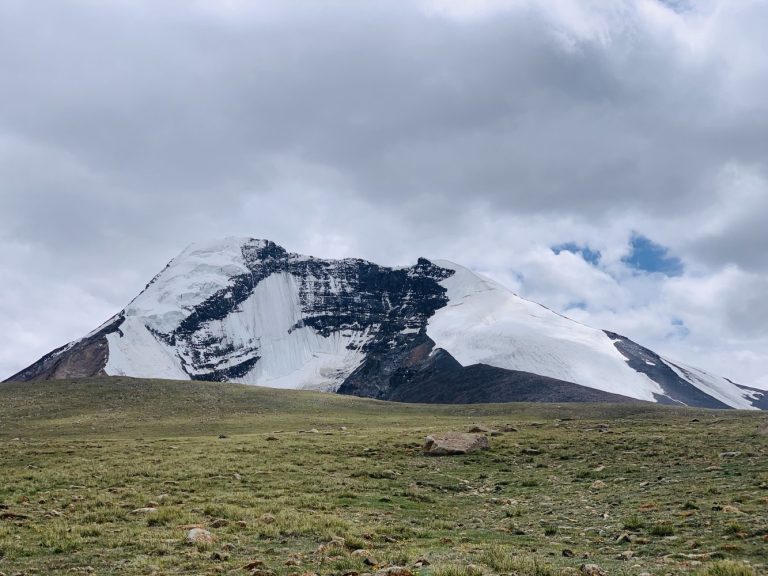
Kang Yatse II is in Hemis National Park and is 20,505.2 ft (6,250 m) above sea level. Going through Markha Valley, you can see Kang Yatse II, one of the tallest trekking peaks in Ladakh’s vast, dry landscape. In the middle of this barren area of scree and loose rocks sits a peak that is nothing short of stunning. This trek is excellent if you’ve never been to the Himalayan Summit, prior experience in high-altitude trekking above 5,000 meters is a must. It’s made for hikers who want an adventure that involves climbing more than 6,000m or who want something different than a typical trekking trip.

II. Overview of Kang Yatse 2

Kang Yatse II, also called the Western Summit of Kang Yatse, is an excellent peak for people who want to move from hiking peaks to semi-technical climbing. This peak has fantastic views of the mountains in the area, such as K2, Broad Peak, and the Gasherbrum Massif to the north, and Nun Kun and the Zanskar range to the west. 

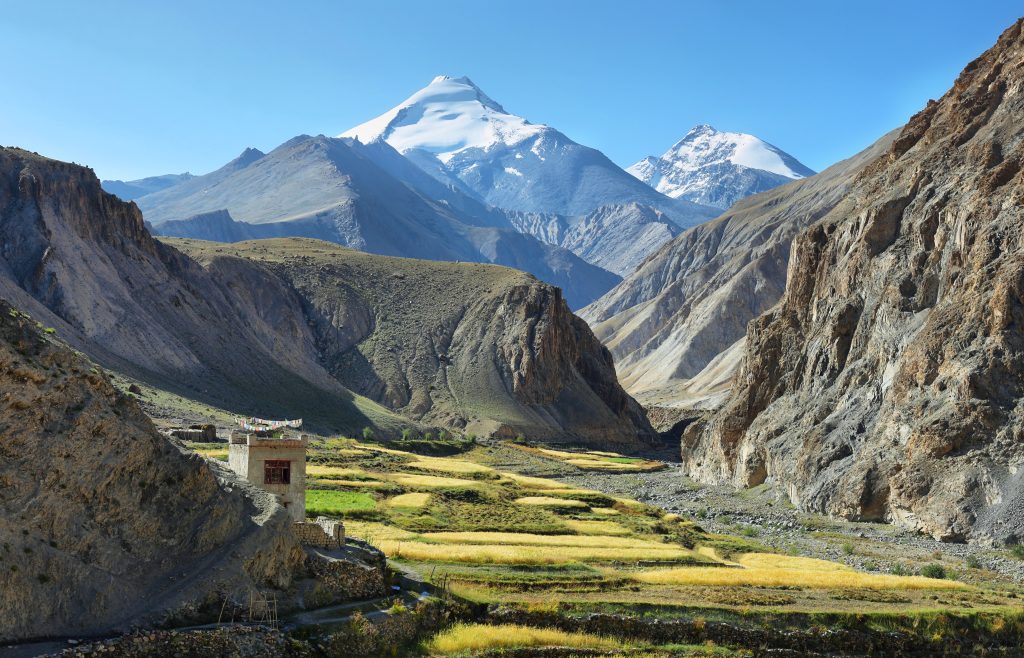
Kang Yatse II is a mountain just over 20,000 ft high. So, mountaineers and hikers with a lot of experience should be ready for a challenging but doable climb. On your way to KY2, you’ll pass through the beautiful Thactungtse and Nimling fields, with many bright wildflowers to look at. The quiet Tigu lakes and the Mani stones are the trek’s highlights. The day it takes to get to the summit is challenging because the path is full of moraines and sharp rocks, and some crevasses are covered in snow for most of the day and require ropes for safety. Even though there are difficulties, the climb is a satisfying mix of fun and challenge. Kang Yatse II is a great place to go if you want to climb a challenging peak with incredible views of the nearby mountains and the beautiful landscape of Ladakh.

III. Accessibility and Logistics

Transportation to and from Leh Airport to the trek’s starting point and back will be provided by TrekNomads. You will also have access to a group of guides, helpers, and organizers who have been trained. Additionally, someone from TrekNomads’ internal staff will also lead the trek.

IV. Climbing Difficulty and Skill Requirements

The trek up Kang Yatse 2 is not for the faint-hearted. To climb Kang Yatse II, you must have excellent fitness. Many experienced climbers use the summit of Kang Yatse II as a fitness test before trying harder climbs at higher altitudes. The summit day is the hardest part of the Kang Yatse 2 Trek. On this day, you must climb up to 3937 ft (1200 m) to reach the peak. For summit efforts, you must get up early and prepare for cold weather. Once you reach the summit, the views are breathtaking.

To climb Mt. Kang Yatse-II successfully, you must plan. Start by working on your cardio fitness, and if you need to, add some lightweight training. This method is an excellent way to prepare for the climb. Taking 6-7-hour walks on nearby trails once or twice a month is a great way to get in shape for the climb. If you still need to get a fitness regime, you must follow TrekNomads’s recommendations. The workout regime will last four months; you must do it at least four times a week. The regimen aims to help you climb efficiently, especially at higher levels. The varied workouts in the regime will benefit every aspect of your health and fitness, including your upper body and core, endurance, lower body, shoulder strength, and breathing pattern. You can be sure you will be ready for the trek if you carefully follow the directions. With the aid of this regime, you’ll not only be able to finish the trek, but you’ll also develop a sense of fitness that you can apply to your daily activities.

V. Stunning Scenery and Natural Beauty

On your trek to Kang Yatse 2, you will see monasteries, traditional Himalayan culture, and the world-famous alpine meadows of the Ladakh Valley. Along with the more common views of Arghal, Bharal, Shapu, and other animals, trekkers can also see the beautiful snow leopard. When hikers leave the Konmaroo La, they will arrive at Nimaling. Just before the camp, beautiful meadows offer one of the most beautiful views of the entire trek. These meadows are some of the most beautiful in the whole Himalayas. There are sheep grazing, a shepherd’s road, and lush plants. When you leave base camp, you’ll start a challenging trip that will test your physical and mental strength to the limit. The Kang Yatse (II) expedition is for expert mountain climbers who want to climb peaks over 19,500 ft. The trekkers’ journey will be much easier if they know mountaineering rules and how to climb technically. Due to the difficulty and the extensive distance of the trek, climbers need to be in peak physical and mental form.

VI. Cultural and Historical Significance

In Leh, there is a busy market where you can try delicious food from many different cultures, such as Mughlai, Tibetan, Chinese, and Italian. With far-off mountains, winding paths, and strong walls, the dramatic landscape will captivate any tourist. Leh is home to many famous sites and monasteries, such as Shanti Stupa, The Leh Palace, Shey, Hemis, Alchi, Thiksey, and Lamayuru, the Armed Forces Hall of Fame, and many others. The trek to Kang Yatse II takes trekkers through breathtaking alpine landscapes, high mountain passes, and remote valleys. The cultural history of the region comes alive as trekkers traverse through traditional Ladakhi villages, interact with the local communities, and witness their way of life. The Kang Yatse II trek offers a unique blend of adventure and cultural immersion. It provides trekkers with an opportunity to experience the natural beauty of the Himalayas while gaining insights into the cultural heritage of the region. The journey to Kang Yatse II is not only a physical challenge but also a chance to appreciate the rich tapestry of history and traditions that have shaped the area over the years.

VII. Safety Considerations

During high-altitude trekking, the human body undergoes acclimatization to cope with reduced oxygen levels. As altitude increases, the air becomes thinner, resulting in lower oxygen availability. In response, the body initiates physiological adjustments to adapt.

One significant adaptation is an increase in respiratory rate. The body compensates for reduced oxygen content in each breath by breathing at a faster rate. This elevated breathing rate helps to maintain an adequate oxygen supply to meet the body’s demands.

Acclimatization involves several complex mechanisms, such as increased production of red blood cells, improved oxygen uptake in the lungs, and enhanced oxygen delivery to the tissues. These adaptations occur gradually over time as the body adjusts to the altitude, allowing trekkers to function more efficiently at higher elevations.

Trekkers need to understand the process of acclimatization and give their bodies sufficient time to adapt during high-altitude expeditions. This helps mitigate the risk of altitude-related illnesses and ensures a safer and more enjoyable trekking experience.

At these high levels, there is dry air. It is essential to drink enough water to keep your body well hydrated and keep your body’s processes running normally. At higher altitudes, it takes more work to keep your muscles working and your body warm, so your body tends to burn more calories generally. Eating well helps your muscles heal and gives you steady energy, which is important for keeping your mind sharp.

VIII. Conclusion

It’s hard to believe how beautiful the high altitude is, and as you head back to base camp, memories of the night and the last push to the summit will return to you. On your way back to Leh, it will be hard to leave the “summit grins,” as we call them, but you will have many memories and a story to tell everyone about your experience. There’s no question that climbing can be a fun and rewarding experience, but it’s important to remember that risks are involved. To lower these risks and ensure the climb is safe and fun, planning, training, and bringing the right gear is essential. The climbing area’s natural beauty should be kept for future generations, so climbers should also value the environment and the local culture.

Responsible trekking involves ensuring minimal impact on the environment and local communities. Trekkers should follow Leave No Trace principles, leaving the trail as they found it and carrying out any waste they generate. It’s important to respect local customs, support local economies, and engage in sustainable practices. Taking responsibility for preserving the natural beauty and cultural integrity of the trekking areas is essential.

Before attempting semi-technical climbs like Kang Yatse II, trekkers should gain experience with high-altitude treks above 5000 meters. These treks provide an opportunity to acclimatize to the thin air, develop physical fitness, and understand the challenges of navigating in such environments. Building a solid foundation of high-altitude trekking experience will better prepare individuals for the technical aspects and higher altitudes associated with climbs like Kang Yatse II. Some of the treks you can try are Everest Base Camp Trek and Annapurna Circuit Trek and other high-altitude treks above 5,000 meters.

Book Now!

Enchanting Beauty of Fansipan and Sapa Trek in Vietnam: A Complete Itinerary Guide

0

Introduction:

The trek in Vietnam is an awe-inspiring adventure that attracts adventurers and nature enthusiasts worldwide. Known as the “Roof of Indochina,” Fansipan is the highest peak in Southeast Asia, standing tall at an elevation of 10,312 ft (3,143 meters).

This trek is of great significance, not only due to its impressive height but also for the breathtaking landscapes and cultural experiences it offers. The trail winds through lush forests, terraced rice fields, and ethnic minority villages, providing a unique opportunity to immerse oneself in the rich local culture.

The trek in vietnam covers a distance of approximately 19 km, challenging hikers with steep ascents, rugged terrain, and rewarding panoramic views from the summit. Standing atop Fansipan, one can witness a magnificent sunrise over the rolling hills and cloud-covered valleys below.

The Fansipan trek is an adventure of a lifetime, offering a blend of physical challenge, natural beauty, and cultural immersion. It is a must-do for those seeking an unforgettable experience in one of Vietnam’s most breathtaking regions.

Welcome to the captivating world of Fansipan, where majestic mountains, vibrant cultures, and breathtaking landscapes await you. This complete itinerary guide will take you on an unforgettable journey through the enchanting beauty of Fansipan, combining the charms of Hanoi, the thrilling trekking trails of Sapa, and the awe-inspiring vistas of Halong Bay. Get ready for an adventure that will leave you mesmerized and create memories to last a lifetime. Let’s dive into this incredible journey together!

Trek in Vietnam Day 1: Hanoi Arrival – Overnight Train:

As you arrive in Hanoi, the bustling capital of Vietnam, you’ll immediately be immersed in its unique blend of old-world charm and modern vibrancy. You can come before the pick-up time or a day earlier than the scheduled arrival day and take some time to explore the city, sample delicious local delicacies, and soak up the rich cultural heritage. Upon arrival at the airport, trekkers will be taken to a restaurant located near the railway station. This will serve as a convenient stop where trekkers can freshen up and enjoy a satisfying dinner before boarding the train. You’ll board the overnight train to Sapa in the evening, eagerly anticipating the adventures ahead.

Day 2: Mount Fansipan Trekking – Overnight Hotel in Sapa:

As dawn breaks, you’ll arrive in Lao Cai, where a 1-hour bus or cab ride will transport you uphill to the beautiful town of Sapa. The journey offers a fantastic glimpse of the stunning vistas and mesmerizing rice terraces that await you. After reaching Sapa, the trekkers can freshen up and leave their luggage at the hotel cloakroom, and savour a delicious breakfast at a local restaurant before preparing for the exhilarating Mount Fansipan trekking adventure.

The journey begins with a transfer from Sapa to Heaven Gate, situated at 6715 ft (2047 m) above sea level. As you embark on the trek, you’ll be surrounded by a pristine forest of towering pine trees and expansive bamboo groves. Traverse the captivating landscapes, absorbing the beauty of your surroundings and breathing in the fresh mountain air. Finally, reach the summit of Fansipan and take in the awe-inspiring panoramic views that stretch as far as the eye can see.

To descend from the summit, Treknomads will provide you with a scenic cable car ride back to Sapa. Return to Sapa by car, where you can relax, recharge, and enjoy the comforts of your hotel. The evening is yours to explore the charming town of Sapa at your leisure.


Day 3: Trek in Vietnam – Sapa Trekking:

After a hearty breakfast, prepare for another day of exploration in the picturesque valleys of Sapa Trek along scenic paths and trails, immersing yourself in the captivating beauty of the region. Depending on the route chosen, you may have the opportunity to visit local villages and interact with ethnic minority groups such as the Hmong hill tribe, gaining insights into their daily lives and traditions.

Alternatively, you can embark on a half-day walk to Cat Cat village, where you’ll witness the stunning terraced fields and have a chance to engage with the Hmong people. Regardless of the chosen route, each step will lead you closer to the heart of Sapa’s enchantment. Upon conquering the majestic Mt. Fansipan, trekkers will have the exciting opportunity to meet the Black Hmong tribal people, immersing themselves in their vibrant culture and traditions. Trekkers will also get to indulge in a delectable lunch at a local village, where they will savour traditional delicacies that will both delight their taste buds and provide an authentic taste of the region. After that, the trekkers will return to Sapa Village in a comfortable car ride. The remaining evening will be at leisure, offering trekkers the chance to explore and indulge in shopping in the charming Sapa Village. Afterwards, they will be conveniently transported to a restaurant located near the railway station. Here, trekkers can freshen up and enjoy a delightful dinner, preparing themselves before embarking on the train journey to Hanoi.

trek in vietnam - terrace farms

Day 4: Halong Bay Cruise – Overnight Cruise:

Today marks the beginning of a new chapter in your journey as you embark on a captivating cruise through the world-renowned Halong Bay. Upon arrival at the railway station, trekkers will be picked up and transported to their hotel, where they can freshen up at the hotel. They will have the convenience of leaving their extra luggage at the hotel cloakroom, as they will be returning and staying in the same accommodation. While waiting for the cruise pick-up vehicle, trekkers can relax and prepare themselves for the upcoming adventure, knowing that their belongings are safely stored at the hotel. After breakfast, travel to the mesmerizing Lan Ha Bay, where you’ll board your cruise ship and set sail on an unforgettable adventure.

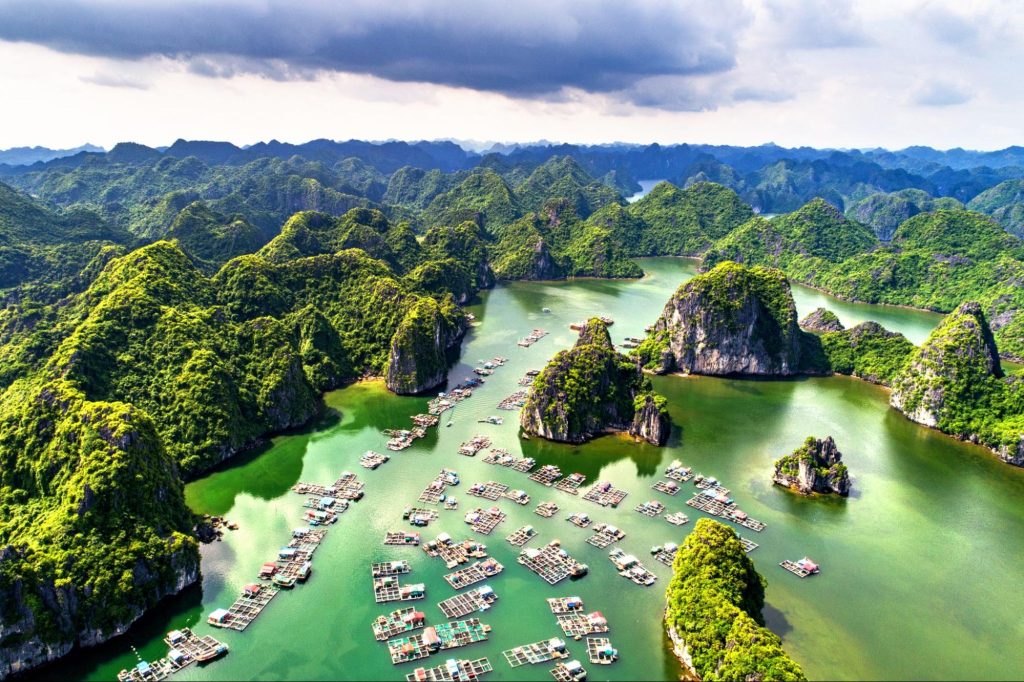
trek in vietnam - halong bay

As you glide through the turquoise waters, be prepared to be mesmerized by the stunning rock formations that dot the bay. Indulge in sumptuous seafood and vegetarian lunch on board as you soak in the breathtaking views. Take the opportunity to relax on the sundeck, bask in the warm sun, or even take a refreshing dip in the outdoor swimming pool.

One of the highlights of the cruise is the chance to explore the Ba Trai Dao area and the natural lagoon of Lan Ha Bay. Grab a kayak and paddle through the serene waters, immersing yourself in the natural beauty of the surroundings. Alternatively, you can indulge in a spa treatment, pampering yourself amidst the tranquil ambience of the bay.

As the day draws closer, join your fellow cruisers for a memorable sunset party. Capture stunning photographs and create lasting memories as the sun paints the sky with vibrant hues. In the evening, delight in a delectable dinner served at the ship’s restaurant. Afterwards, you can participate in the enchanting squid fishing program, relax on the sundeck under the starry night sky, or unwind in the cozy comfort of your cabin.

Day 5: Halong Bay Cruise Transfer to Hanoi – Overnight Hotel in Hanoi:

Awake to the gentle sounds of the bay and savour a delicious breakfast on board as you take in the morning view of the surrounding landscape. The adventure continues as you visit the famous Frog Pond area, the filming location for the famous movie “Kong: Skull Island.” Here, you can freely kayak, explore the captivating scenery, or take a refreshing swim in crystal-clear blue waters.

Return to your cabin, pack your belongings, and bid farewell to the cruise as you complete the check-out procedure. Enjoy a final lunch on board as the ship returns to the harbour. Once you disembark, a high-speed canoe will take you back to Tuan Chau port, and from there, a luxury limousine will transport you back to Hanoi.

Arriving in Hanoi in the afternoon, you’ll check into your hotel and have the opportunity to rest and relax after the eventful journey. Take this time to reflect on the extraordinary experiences and stunning landscapes that you have encountered throughout your adventure.

Day 6: Hanoi – Departure:

As your time in Vietnam draws close, enjoy a leisurely breakfast at the hotel and savour the remaining hours in Hanoi. This bustling city offers a plethora of activities and sights to explore. Take a stroll around Hoan Kiem Lake, immerse yourself in the vibrant atmosphere of the Old Quarter, or visit significant landmarks such as the Ho Chi Minh Mausoleum and the Temple of Literature.

hanoi - trek in vietnam

In the afternoon, a group airport drop will be scheduled for convenience, allowing trekkers to easily depart from the hotel. They will have the option to either join the scheduled group airport drop-off or make their arrangements, as they bid farewell to the enchanting beauty of Fansipan and the captivating country of Vietnam. Take cherished memories, a sense of adventure, and the desire to return to this remarkable destination someday.

Trek in Vietnam- Conclusion

Embarking on an adventure to explore the enchanting beauty of Fansipan is a journey that will captivate your senses and leave you in awe of the natural wonders that Vietnam has to offer. From the vibrant streets of Hanoi to the challenging trekking trails of Sapa and the breathtaking landscapes of Halong Bay, each day of this itinerary provides a unique and unforgettable experience.

Immerse yourself in the cultural tapestry of Sapa, trek through lush forests, and witness the panoramic views from the summit of Fansipan. Indulge in the serenity of Halong Bay, cruising amidst picturesque rock formations and delicious meals on board. These experiences will create lasting memories and leave you with a deep appreciation for the enchanting beauty of Fansipan and its surroundings.

So, pack your bags, embrace the sense of adventure, and embark on this trek in vietnam that will take you beyond your imagination. Whether you’re a nature enthusiast, an adventure seeker, or a cultural explorer, this itinerary caters to all.

Read more:

Enchanting Beauty of Fansipan Trek: A Complete Itinerary Guide 

Your ultimate guide to Mt Fansipan trekking in Vietnam

Weather and Seasons: Best Time to Summit Mount Elbrus

0

I. Mount Elbrus Expedition: Introduction

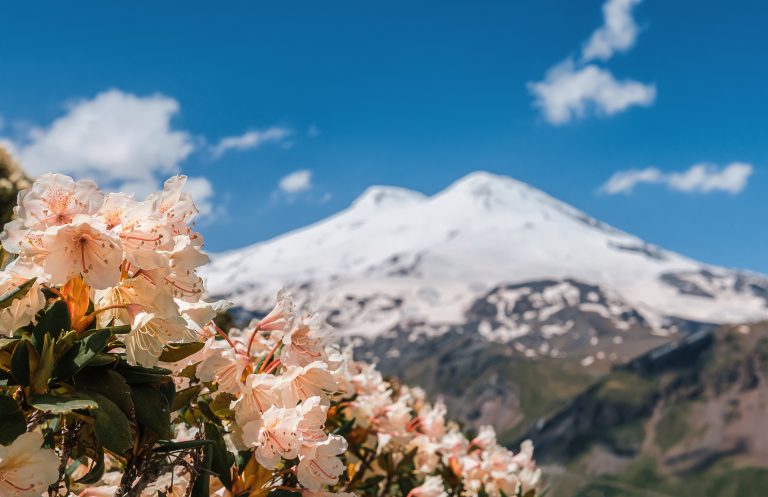
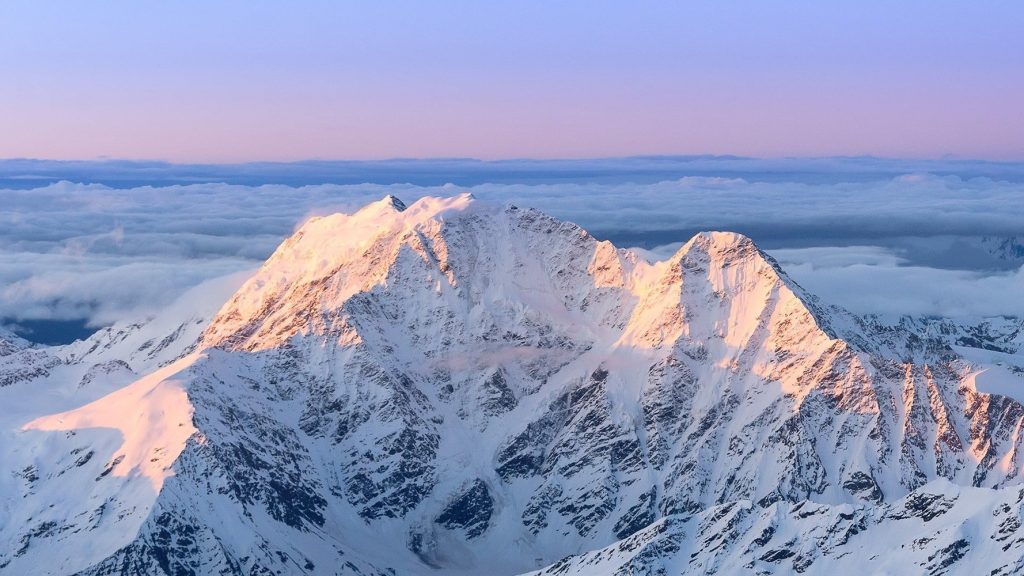
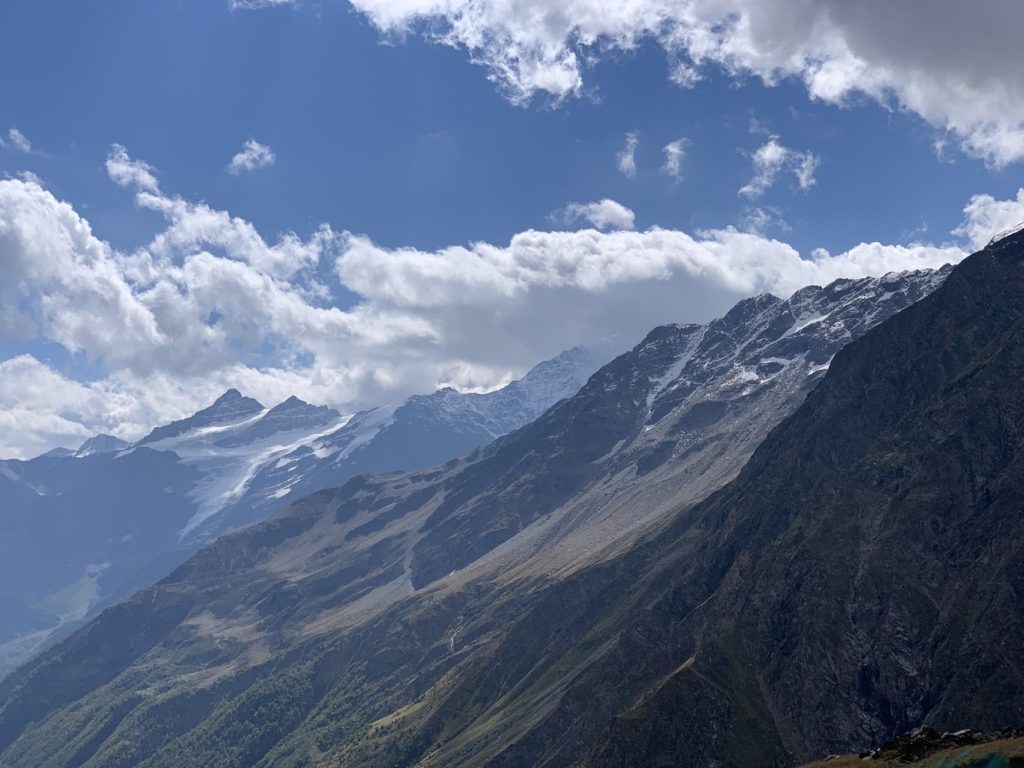
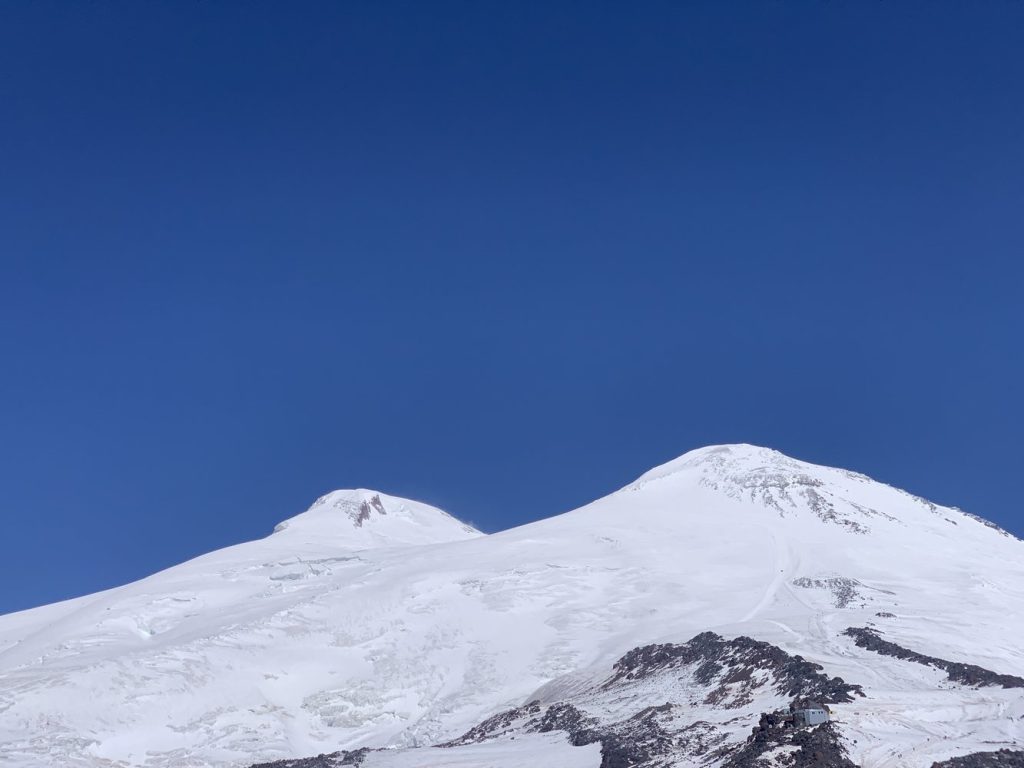
Mount Elbrus is one of the world’s most iconic and challenging peaks, located in the Caucasus Mountains of Russia. Rising to a height of 18,510 feet (5,642 meters), it is the highest mountain in Europe and attracts climbers and adventurers from around the globe. The mountain’s stunning beauty, rich history, and physically demanding climbing routes make it a popular destination for trekking enthusiasts. Several factors come into play when considering the timing of the climb, including weather conditions, crowd levels, and personal fitness and experience. It is also one of the peaks to be submitted under Seven Summits’ challenges of climbing the highest peaks of all seven continents. 

mount elbrus

II. Weather and Seasons on Mount Elbrus

Two main climbing seasons and their characteristics

Summer Season (June to September)

The summer season is considered the primary climbing season on Mount Elbrus. It offers the best weather conditions for climbing and trekking. June and July are generally the busiest months, with August and September slightly less crowded. During summer, the weather on Mount Elbrus is relatively milder, with warmer temperatures and longer daylight hours. However, the weather can still be unpredictable, and climbers should be prepared for sudden changes. In June, temperatures at the base of the mountain range from 10 to 20 degrees Celsius. As you ascend, temperatures drop, averaging 0 to -10 degrees Celsius at higher altitudes. Rain and snowfall are relatively lower during the summer, but occasional snow showers can still occur. Being prepared for changing weather conditions is essential, especially at higher elevations. The average temperature in these months is -10°C to -5°C (14°F to 23°F) at the summit. 

Winter Season (December to March)

The winter season on Mount Elbrus attracts fewer climbers due to harsher weather conditions and more challenging terrain. It is suitable for experienced mountaineers seeking a more adventurous and demanding climb. December and January are the coldest months, with temperatures ranging from -20°C to -30°C (-4°F to -22°F). February and March are milder but still quite cold, with temperatures ranging from -15°C to -25°C (5°F to -13°F). The mountain becomes significantly more challenging due to icy slopes, deep snow, and increased avalanche risk. Temperatures at the mountain’s base can drop below freezing, ranging from -10 to -20 degrees Celsius. At higher elevations, temperatures can plummet to -30 degrees Celsius or lower. Winter sees the most significant snowfall, with snow covering the entire mountain. The deep snow accumulation makes climbing more strenuous, requiring technical skills and appropriate equipment.

mt elbrus map

How weather affects climbing conditions

Mount Elbrus experiences freezing temperatures, even during the summer climbing season, with temperatures ranging from -10°C to -20°C (14°F to -4°F) at lower altitudes and dropping to -30°C to -40°C (-22°F to -40°F) or even lower at higher elevations. Climbers must be adequately prepared with appropriate clothing and gear to withstand the cold. Weather disturbances can bring precipitation to Mount Elbrus, including snow and rain. Precipitation can affect climbing conditions by making the terrain slippery and increasing the risk of avalanches. Climbers need to be cautious and adjust their plans accordingly when encountering precipitation. The wind is a significant factor on Mount Elbrus. High winds can reach speeds of 80 km/h to 100 km/h (50 mph to 62 mph) or even higher. Strong winds can decrease visibility, increase the risk of frostbite, and make it difficult to maintain balance and progress. 

Climbers need to consider wind speed and direction when planning their ascent and may need to wait for favourable conditions. It’s important to note that climbing Mount Elbrus requires proper acclimatization, physical fitness, mountaineering skills, and the necessary equipment, regardless of the season. It’s advisable to consult with experienced guides or join organized expeditions to ensure a safe and successful climb.

elbrus best time

III. Best Time to Climb Mount Elbrus

Comparison of the two climbing seasons

Summer Season

The summer climbing season on Mount Elbrus usually runs from late June to early September. Warmer temperatures and longer daylight hours characterize this period. During the summer season, the weather on Mount Elbrus is relatively mild compared to the winter season. However, it can still be unpredictable, with temperature fluctuations, strong winds, and occasional storms. The average temperatures range from around 5°C at the base to -10°C at the summit. 

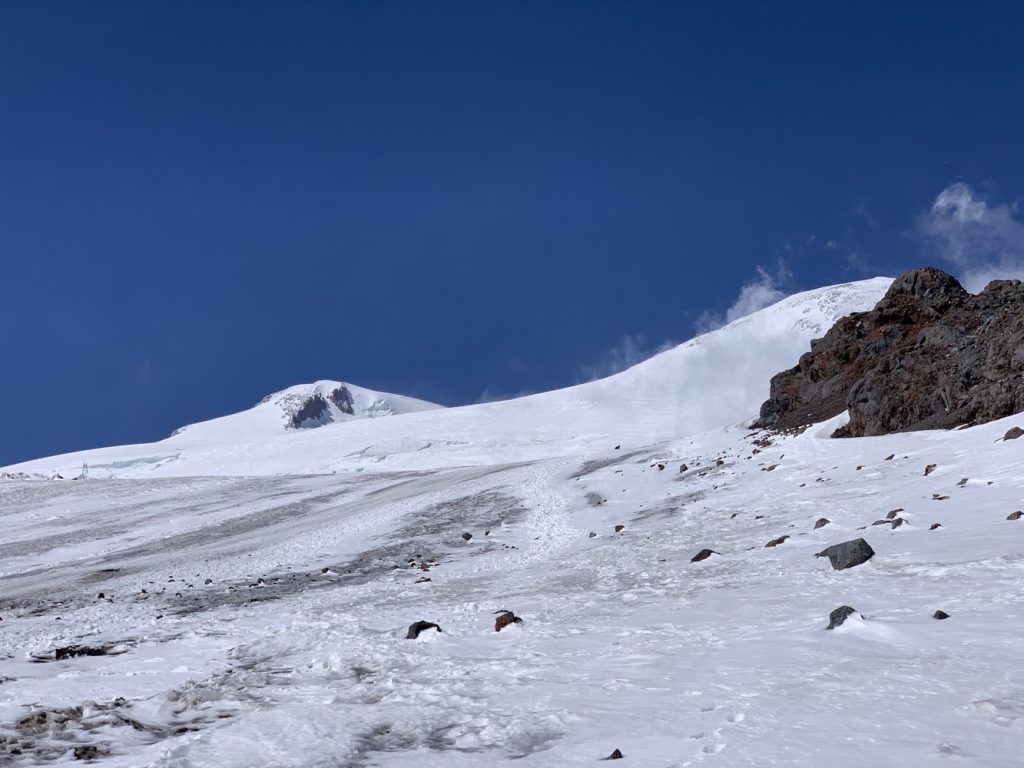
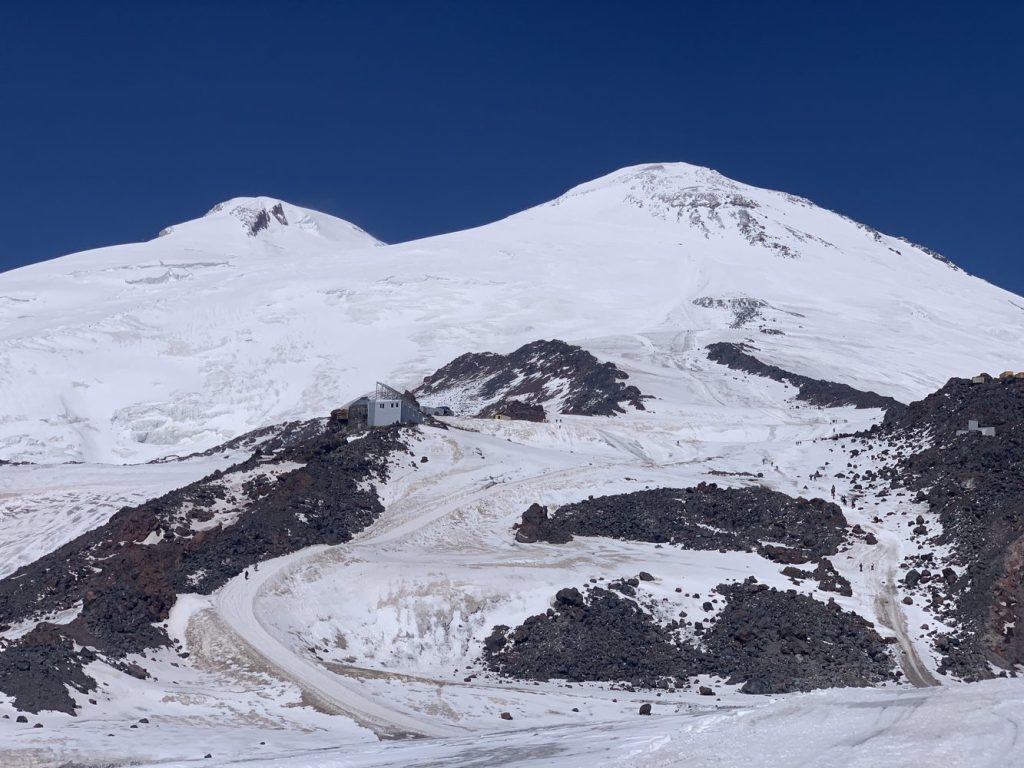
The snow conditions during summer vary depending on the recent weather and the specific route chosen. Lower down the mountain, there may be less snow; higher up, there can still be significant snowfields and glaciers. During the summer season, the lower parts of the mountain and the mountain huts are more easily accessible. The cable cars and chairlifts are generally in operation, allowing climbers to reach higher elevations more quickly. The summer season tends to be busier on Mount Elbrus, with more climbers attempting the summit. This can result in more crowded routes, potential queueing at sections like the saddle, and limited availability of accommodations and services. 

elbrus mountain map

Winter Season

The winter climbing season on Mount Elbrus typically extends from December to March. Colder temperatures and shorter daylight hours characterize this period. Winter conditions on Mount Elbrus are harsh, with temperatures dropping well below freezing. The average temperatures at the summit can range from -20°C to -30°C or even lower. Severe winds, snowstorms, and reduced visibility are common during this season. The mountain is covered in deep snow during winter, and the snowpack is generally more stable and consolidated. The routes may have fewer crevasses and open bergschrunds compared to the summer season. 

Climbers often require specialized equipment such as snowshoes, crampons, and ice axes. The winter season poses additional challenges due to the heavy snowfall and freezing temperatures. The cable cars and chair lifts may not be operational, and access to the mountain huts can be more difficult. Climbers often need to use snowcats or snowmobiles to reach higher elevations. The winter season generally sees fewer climbers attempting Mount Elbrus than the summer. It offers a more secluded and remote experience, with fewer people on the mountain.

Both seasons have their advantages and challenges. The summer season provides milder weather and longer daylight hours, making it more suitable for climbers who prefer relatively more comfortable conditions and a higher chance of success. On the other hand, the winter season offers more challenging and adventurous conditions, with deep snow and a quieter atmosphere on the mountain. When planning a climb to Mount Elbrus, it’s essential to consider your climbing experience, skill level, personal preferences, and the availability of appropriate gear and services during each season. It’s also recommended to consult with local mountaineering agencies or experienced climbers familiar with the mountain’s current conditions.

mt elbrus map

IV. Tips for Climbing Mount Elbrus

Preparation and training advice

Climbing Mount Elbrus, the highest peak in Europe, is a challenging and rewarding endeavour. It requires proper preparation and training to ensure your safety and increase your chances of a successful summit. Focus on cardiovascular exercises like running, cycling, and hiking to improve your endurance. Incorporate strength training exercises to build your core, leg muscles, and upper body strength. Gradually increase the intensity and duration of your workouts to mimic the demands of climbing at high altitudes. Consider working with a personal trainer or seeking advice from a fitness professional to design a tailored training plan. It’s essential to prioritize safety and be prepared physically, mentally, and technically for the Elbrus expedition.

Equipment recommendations

  • Mountaineering Boots: Invest in a good pair of mountaineering boots designed for high-altitude climbing. They should be waterproof, insulated, and compatible with crampons.
  • Ice Axe: An ice axe is crucial for self-arrest and stability while traversing icy slopes. Choose a lightweight ice axe with a comfortable grip.
  • Layered Clothing: Layering is essential for adjusting to changing weather conditions. Carry base layers, mid-layers, and a good quality waterproof and windproof shell jacket and pants.
  • Insulated Gloves: Invest in warm, waterproof gloves with good dexterity. Consider having an extra pair as a backup.
  • Gaiters: Gaiters provide additional protection for your lower legs and keep snow out of your boots.
  • Trekking Poles: Trekking poles provide stability and reduce stress on your knees during long ascents and descents.

Carry lightweight, high-energy snacks like energy bars, nuts, and dried fruits. Ensure you have a sufficient supply of water or purification methods. Remember, climbing Mount Elbrus is a tough endeavour, and it’s essential to have proper training, experience, and knowledge about high-altitude climbing. If you need to become an experienced mountaineer, consider hiring a local guide or joining a reputable expedition company to ensure your safety and increase your chances of a successful summit.

elbrus trekking expedition

Safety considerations

Ensure that you are in good physical condition before attempting the climb. Climbing Mount Elbrus requires high fitness and endurance due to its altitude and challenging terrain. Engage in regular exercise and altitude training to prepare your body for the climb. Take rest days at intermediate camps to aid in acclimatization and reduce the risk of altitude-related illnesses. Be aware of the weather forecast and plan your climb accordingly. Mount Elbrus experiences harsh weather conditions, including extreme cold, high winds, and frequent storms. Check the forecast before starting your ascent, and be prepared to adjust your plans or postpone if the conditions are unfavourable.

Ensure you can access communication devices like radios or satellite phones to contact emergency services. Familiarize yourself with evacuation routes and nearby medical facilities. Respect the mountain environment by following the principles of Leave No Trace. Minimize your impact on the natural surroundings, pack out all trash, and be mindful of the local flora and fauna. Remember that climbing Mount Elbrus is challenging and should not be taken lightly. Prioritize safety, make informed decisions, and be prepared for the physical and mental demands of the climb.

Trekking Mount Elbrus offers a thrilling and challenging experience for outdoor enthusiasts. The best time to undertake this adventure is during the summer when the weather is relatively more stable. However, it is essential to remember that Mount Elbrus is a high-altitude mountain, and weather conditions can be harsh and unpredictable at any time. Proper planning, adequate equipment, and consulting with experienced guides are crucial to ensuring a safe and successful trek up this majestic peak.

Visit Here To Book Now!


Facing the Elements: Weather and Seasonal Considerations for Kang Yatse 2 Expedition

0

Kang Yatse 2 Expedition: Introduction

Kang Yatse 2 expedition is a challenging and exciting adventure in the Himalayas. The summit of Kang Yatse 2 is located at a height of 20,505 ft (6,250 m). The importance of weather and seasonal considerations must be taken into account in this expedition. The team must carefully plan their ascent to avoid dangerous weather conditions and take advantage of the best seasonal window for climbing. Proper acclimatization and physical fitness are crucial for success in this high-altitude environment. 

The Kang Yatse 2 expedition is an excellent choice for experienced climbers and those seeking their first 6000m ascent. It offers a challenging yet manageable climb, making it suitable for individuals with proper training. The route is less technically demanding compared to Kang Yatse 1, which makes it more accessible for climbers with intermediate skills. The stunning panoramic views of the surrounding Himalayan range and the Ladakh region add to the allure of this climb. However, it is essential to be well-prepared, equipped and informed about the local weather conditions before undertaking the ascent.

The blog post emphasizes the importance of preparation and caution in mountaineering expeditions. It also discusses the essential factors contributing to a successful climb, including weather conditions, timing, and physical fitness. 

kang yatse 2 expedition

Kang Yatse 2 Expedition Seasons

Kang Yatse is a mountain located in Ladakh, Union Territory (UT) of India. It consists of two peaks: Kang Yatse 1 and Kang Yatse 2. Kang Yatse 1 is the highest peak at approximately 20,997 ft (6,400 m), attracting mountaineers with technical climbing routes. Kang Yatse 2, around 20,305 ft (6,187 m), is considered a trekking peak with less technical difficulty. Weather conditions vary based on the time of year and altitude. Proper preparation, equipment, and local guidance are crucial for climbers and trekkers. Here are the typical weather conditions you might encounter during an expedition to Kang Yatse 2:

Summer (June to August)

During the day, temperatures can range from 10 to 20 degrees Celsius at lower altitudes. However, at higher altitudes, temperatures can drop below freezing point. Nighttime temperatures can drop significantly, often reaching below freezing point, especially at higher altitudes. The summer months are the monsoon season in the region, so there is a higher chance of rainfall. It’s essential to be prepared for rain showers and occasional thunderstorms.

Autumn (September to October)

Temperatures start to cool down during autumn. Daytime temperatures can range from 5 to 15 degrees Celsius at lower altitudes, while higher altitudes may experience freezing temperatures during the day. Nights become colder, with temperatures dropping below freezing point, especially at higher altitudes. Precipitation decreases compared to the monsoon season, but there may still be occasional rainfall or snowfall, particularly in October.

Winter (November to February)

Winter in Kang Yatse 2 is extremely cold. Daytime temperatures may range from -10 to 5 degrees Celsius at lower altitudes. However, temperatures can drop significantly at higher altitudes, often reaching -20 degrees Celsius or lower. Nights are even colder, with temperatures dropping well below freezing throughout the region. Snowfall is common during winter, and the region may receive heavy snowfall. It’s essential to be prepared for severe weather conditions and potential avalanches.

kang yatse 2 height

Spring (March to May)

As spring arrives, temperatures start to rise. Daytime temperatures can range from 5 to 15 degrees Celsius at lower altitudes, while higher altitudes may still experience freezing temperatures during the day. Nights remain cold, with temperatures dropping below freezing point, especially at higher altitudes. Spring is the dry season in the region, but there may still be occasional rainfall or snowfall.

It’s important to note that weather conditions can change rapidly in mountainous regions and can be more severe and unpredictable at higher altitudes. It is advisable to check the weather forecast regularly, be prepared for sudden changes, and have proper equipment and clothing suitable for the prevailing conditions. Additionally, having a good expedition team with experienced climbing guides and team is very crucial for a safe and successful summit.

kang yatse 2 trek blog

Potential Weather Hazards and Challenges

Kang Yatse 2 is a mountain peak in Ladakh, Union Territory of India. Here are some potential weather hazards that climbers may face:

  • Extreme Cold: Kang Yatse 2 is situated in a high-altitude region where temperatures can drop significantly, especially during the winter months and at night. Cold temperatures can lead to frostbite, hypothermia, and other cold-related injuries if climbers are not adequately prepared with proper gear and clothing. To mitigate the risks of extreme cold, climbers should carry high-quality cold-weather gear, including insulated clothing, gloves, and boots, and ensure proper layering. Paying attention to weather forecasts and planning climbs during milder seasons can also help manage cold-related dangers.
  • High Winds: Mountain peaks, including Kang Yatse 2, are prone to strong and gusty winds. High winds can make climbing more challenging and increase the risk of falls and accidents, especially on exposed ridges and summits. It is crucial to be prepared for strong winds and secure equipment and tents properly. Climbers should be prepared with sturdy and wind-resistant equipment, such as tents and harnesses, and secure their gear properly to prevent it from being blown away. Monitoring weather conditions and avoiding exposed areas during periods of high winds is essential for safety.
  • Snowfall and Blizzards: Kang Yatse 2 experiences snowfall throughout the year, but is more prevalent in winter and early spring. Heavy snowfall can make climbing more difficult, create avalanche risks, and reduce visibility. Climbers should be prepared for snowstorms and blizzards, which can be dangerous and require proper sheltering. Being equipped with appropriate winter gear, such as crampons and ice axes, and maintaining good visibility through goggles or sunglasses is crucial when facing snowfall and blizzards. Choosing the right time to climb and being prepared to hunker down or turn back in adverse weather conditions are important precautions.

kang yatse 2 trek

  • Avalanche Risk: The region around Kang Yatse 2 is prone to avalanches, especially in winter and early spring. Climbers must be knowledgeable about assessing avalanche conditions, carrying appropriate safety equipment such as beacons, shovels, and probes, and have the necessary training in avalanche rescue techniques. Climbers should undergo avalanche safety training, carry avalanche rescue equipment, and have the knowledge to assess avalanche conditions. Staying up to date with avalanche bulletins and avoiding high-risk areas during periods of instability is essential for managing avalanche hazards.
  • Rapid Weather Changes: Mountainous regions can experience rapid weather changes, including the formation of clouds, thunderstorms, and lightning. Climbers should be aware of the local weather patterns and monitor weather forecasts regularly to avoid being caught in dangerous weather conditions. Being attentive to weather forecasts and regularly monitoring changes in the local weather conditions can help climbers stay informed and make timely decisions. Having a flexible itinerary and being prepared to adjust plans accordingly is important when facing rapid weather changes. 

Acute mountain sickness (AMS):

Altitude sickness, also known as acute mountain sickness (AMS), can be a concern when climbing high-altitude peaks like Kang Yatse 2. Altitude sickness occurs when the body cannot adjust to the reduced oxygen levels at high altitudes. Symptoms typically include headache, nausea, dizziness, fatigue, loss of appetite, and difficulty sleeping. Proper acclimatization is crucial to minimize the risk of altitude sickness. Ascend gradually, allowing your body time to adjust to the altitude. Plan your itinerary to include rest days at intermediate altitudes, allowing your body to acclimatize before ascending further. Be vigilant in recognizing the early signs of altitude sickness. If you or any team member experiences symptoms like severe headache, persistent vomiting, difficulty breathing, confusion, or a rapid heartbeat, it’s crucial to immediately descend to a lower altitude.

Stay well-hydrated throughout your expedition by drinking plenty of fluids, preferably water. Proper nutrition is also essential, as your body requires additional energy at high altitudes. Consume a balanced diet rich in carbohydrates and avoid excessive alcohol and caffeine intake. Pay attention to your body’s signals. If you or anyone in your group is experiencing severe symptoms of altitude sickness, do not ignore them or push through. Descend immediately and seek medical assistance if necessary. Remember, altitude sickness can affect anyone, regardless of their experience at high altitudes. Proper preparation, acclimatization, and monitoring of symptoms are crucial to reducing the risks associated with altitude sickness during your Kang Yatse 2 expedition.

kang yatse 2 summit trek

How to Pack According to Weather for Kang Yatse 2 Expedition

Clothing

  • Base Layers: Choose moisture-wicking and insulating base layers to regulate your body temperature.
  • Insulating Layers: Carry fleece jackets or down-filled mid-layers to provide warmth during colder conditions.
  • Outer Shell: Invest in a durable, waterproof shell jacket and pants to protect you from wind, snow, and rain. Look for breathable fabrics with sealed seams.
  • Trekking Pants: Opt for lightweight, quick-drying pants with good mobility. Convertible pants are also helpful for adjusting to different temperature changes.
  • Trekking Shirts: Pack a few lightweight, moisture-wicking shirts for trekking, preferably long-sleeved to protect against the sun and insects.
  • Insulated Jacket: Bring a warm jacket for colder nights at higher altitudes.
  • Headwear: Carry a warm beanie or hat, a sun hat with a wide brim, and a buff or neck gaiter for face protection.
  • Gloves: Have a pair of lightweight liner gloves for lower altitudes and a thicker pair of insulated gloves for higher altitudes.
  • Socks: Choose moisture-wicking and cushioned hiking socks to prevent blisters. Carry extra pairs for longer treks.

Footwear

  • Hiking Boots: Invest in sturdy, waterproof hiking boots with ankle support. Ensure they are broken in before the expedition to avoid discomfort.
  • Crampons: Crampons are a key traction device that provide added security to prevent falls and other accidents. Invest in high quality crampons to avoid any accidents.
  • Gaiters: Wear gaiters to remove snow, debris, and moisture from your boots.

Tips for layering and staying warm on the Kang Yatse 2 expedition

Layering is essential to trap heat and insulate your body. Wear a base layer made of moisture-wicking material, followed by a mid-layer for insulation and an outer shell for protection against wind and moisture. Choose fabrics like wool or synthetic materials that retain heat even when wet. Wear thermal socks, and consider using toe warmers or vapor barrier liners to prevent moisture from reaching your feet. Moisture is your enemy in cold weather. Wear moisture-wicking base layers, avoid sweating excessively by adjusting your clothing layers accordingly, and carry spare clothes to change into if necessary. Proper hydration and nutrition help regulate your body temperature. Drink plenty of water and consume calorie-dense, high-energy foods to maintain energy levels and generate body heat. Fill a water bottle with hot water and keep it in your sleeping bag or inside your jacket to provide localized warmth. Always prioritize safety and be aware of the signs of hypothermia and frostbite. 

kang yatse 2 expedition

Safety considerations for Kang Yatse 2 expedition

Importance of monitoring weather conditions for safety

Unfavourable weather conditions can increase the likelihood of accidents and injuries during an expedition. Slippery surfaces, reduced visibility, or unstable terrain caused by adverse weather can lead to falls, avalanches, or other dangerous situations. By monitoring weather conditions, climbers can anticipate and avoid such risks, ensuring their safety. Weather conditions can significantly impact climbing strategies and routes. Monitoring weather forecasts allows expedition leaders and climbers to plan their ascent based on predicted weather patterns, including wind direction and speed, temperature changes, and precipitation. Monitoring weather conditions is essential for climbers attempting to summit Kang Yatse 2 or any other mountain. It enables them to make informed decisions, mitigate risks, and prioritize safety throughout the Kang Yatse 2 expedition.

kang yatse 2 summit

Strategies for staying safe during extreme weather

  • Respond to alerts and warnings from local authorities or mountain rescue teams.
  • Invest in high-quality gear designed for extreme weather conditions.
  • Ensure equipment is in good condition and suitable for the expected weather.
  • Remain calm and avoid rushing during ascent and descent.
  • Seek immediate shelter if weather conditions worsen.
  • Set up a sturdy tent or find naturally sheltered areas.
  • Monitor weather forecasts and adjust plans accordingly.
  • Undergo avalanche safety training and carry proper rescue equipment.
  • Stay informed about avalanche conditions through bulletins.
  • Be flexible and willing to adjust plans based on weather changes.

To Conclude…

Safety should always be a top priority, so take all necessary precautions and follow the guidance of experienced climbers or guides. While climbing Kang Yatse 2, stay attentive to weather conditions and be prepared to adjust your plans accordingly. Take it one step at a time, appreciating each milestone’s incredible scenery and accomplishment. Remember that the journey itself is as important as reaching the summit. Most importantly, enjoy every moment of this incredible adventure. The mountains have a way of revealing our strengths and providing a sense of awe and wonder. Take the time to immerse yourself in the experience, cherish the friendships formed, and create memories that will last a lifetime.

Book the Kang Yatse 2 Expedition Now!

Why is Tarsar Marsar trek the most beautiful trek in Kashmir?

0

Tarsar Marsar in Kashmir is undoubtedly a beautiful trek. It is a moderate trek, perfect for beginners and experienced trekkers. The best part of this trek is the mindblowing glimpse of the Tarsar Marsar Lakes you get from a distance. The two twins are situated at 3,810 m (12,500 ft) and 3,962 m (13,000 ft) respectively. These two lakes are also known as the twin sisters because of their close resemblance.

The hike is known for exploring gorgeous valleys, beautiful meadows, and the twin sister lakes. Tarsar Lake is known for its stunning turquoise color, while Marsar Lake is perfect for camping under the stars. The velvety meadows, alpine forests, and glaciers are all worth watching. The trek involves crossing several high-altitude mountain passes, including the Shekwas La pass, 3,340 m (11,154 ft), which adds to the challenge and excitement of the trek.

One might run out of words while describing the trek’s beauty. However, certain attractions can give you an unforgettable experience. A few of them are given below.

tarsar marsar trek from aru velley

The striking meadows of Lidderwat and Shekwas

From Aru, you will head towards Lidderwat and then Shekwas to witness the breathtaking views of the meadows at these fantastic campsites. You will come across a beautiful valley with a stream flowing through it. While every part of the trek is simply amazing, the meadows of Lidderwat and Shekwas are astonishing. 

Nature lovers would fall for its beauty as they witness nature in its purest form. The campsites of Lidderwat and Shekwas are filled with velvety green meadows, tall pine trees, several mountains, and a sapphire blue sky. Camping at such beautiful places will relieve all the tiredness of the day. You can also hike to the Jadar Lake from the Shekwas campsite. 

tarsar marsar trek

Astonishing Tarsar, Marsar, and Sundersar lakes

  • On this trek, you will witness three beautiful oligotrophic lakes: Tarsar, Marsar, and Sundersar. From Shekwas, you will head towards Tarsar Lake. It is situated between the Sindha and Lidder valleys and has a beautiful almond shape. The lake often remains frozen and is covered with snow in winter. Some migratory birds like bar-headed geese, golden eagles, Cinnamon Sparrows, black bulbuls, and more. The trek offers picturesque views. Remember to click some fabulous pictures here. The snow-capped mountains and the turquoise-colored water are an impressive background for the pictures. The lake changes color with every sunrise and sunset and gives a mesmerizing view. 
  • After the Tarsar Lake, you will head towards its twin sister, the Marsar Lake, another oligotrophic alpine lake famous for its scenic beauty. The characteristics of Marsar Lake are similar to that of Tarsar Lake. The weather at this lake often remains unprecedented. During monsoons, the lake is covered by clouds and mist, which gives the trekkers a beautiful view to capture the memories from the trek. 
  • From Marsar Lake, you will head towards Sundersar Lake, another main attraction of the trek. The lake soaks you up in its dramatic beauty and mesmerizing views. Sundersar Lake has a few tough ridges around it and appears almost like a closed lake. The trail towards Sundersar Lake has small boulder sections that make the trek tough. But the views that come along with it are equally rewarding. The view of the valley leading to Zachmargi on the ridge’s other side is breathtaking. Upon descending into the valley, we walk along the stream from Sundarsar Lake. 

tarsar marsar lake

Trek Gradient of Tarsar Marsar Trek

The trek is a wonderland for all adventure seekers. It offers scenic views, a calming environment, and an unforgettable experience. The best part is that a rookie trekker with decent fitness levels can complete the trek easily. If you are a beginner and wondering if you are a good fit for the trek, then the good news is that you are. However, you must have a good fitness level.

Moreover, it would help if you started training and working out to build your strength at least 3 to 4 months before the trek. This will help you cope with all the hurdles that come your way. You must pay attention to your fitness level for this trek because several steep ascents and descents on the trek trail might be challenging for a beginner. 

tarsar marsar trek route

Incredible campsites on the Tarsar Marsar Lake 

On the Tarsar Marsar trek, you get an opportunity to camp beside a lake and even on river banks. Imagine yourself sitting beside Tarsar Lake, enjoying the views of the bluish-green water of the lake, snow-covered mountains, and lovely meadows. No words can describe the live experience. 

Lidderwat is a campsite situated at an altitude of 9,000 feet and is surrounded by lush green meadows and dense forests. The campsite is named after the Lidder River, which flows nearby and provides a water source for the camp. Trekkers can spend the night in tents at the campsite and enjoy the beauty of the surrounding meadows and stunning landscapes. 

You can set your tents up on the shores of the Tarsar or Sundersar lakes and dive into the mesmeric beauty of the lakes. This trek is one refreshing trek of our lives that will make us forget all our worries. The views are exceptional, and you often feel like opening the flaps of your tents and getting indulged in the views. Whether camping at Tarsar Lake or Sundersar Lake, you will fall for the views from any of these sites. The highlight of the Tarsar campsite is that you can see a stream originating from Tarsar Lake, which is highly stimulating. You can see snow-laden mountains at Sundersar Lake; their reflection falls in the lake. Wonder how amazing that could be to witness for real? 

tarsar marsar kashmir trek

Some unique aspects of the Tarsar Marsar trek that contribute to not only scenic but also a wholesome experience:

  1. Hidden Waterfalls: The trek takes you through several hidden waterfalls that are not accessible by road or any other means of transport. You must trek through dense forests and climb over rocks to reach these waterfalls, making it a unique and thrilling experience.
  2. Remote Villages: The trek takes you through some of the most remote villages in the Kashmir valley. These villages are inaccessible by road and have a unique way of life centered around their livestock and the high-altitude meadows.
  3. Local Cuisine: During the trek, you will taste some of the most delicious local cuisine, including Rogan Josh, Gushtaba, and Kahwa. These dishes are unique to Kashmiri cuisine and are prepared using traditional methods.
  4. Camping Under the Stars: The Tarsar Marsar trek offers some of the best camping sites in the Kashmir valley. You will get to camp under the stars, surrounded by snow-capped mountains and the sound of gurgling streams.
  5. Off-Beat Trail: The Tarsar Marsar trek is a less crowded and off-beat trail than other popular treks in the region. This makes it a unique experience, where you can explore the beauty of nature without the usual hustle and bustle of tourists.

By booking with TrekNomads, you can witness all the fantastic sights of Tarsar Marsar Lake and its campsites. We love seeing our client’s happiness, and thus, we aim to provide them with an extraordinary experience. Our team is as excited as you are for the Tarsar Marsar trek. So, let’s dive into the most enthralling beauty of the trek. 

Conclusion:

The Tarsar Marsar trek, offered by Treknomads provides an extraordinary and enriching experience that is well worth the investment. Priced at Rs. 24,899 per person, this trek guarantees a personalized itinerary tailored to each trekker’s interests and physical abilities, ensuring a memorable journey for all participants.

Compared to other operators, Our Treknomads may have higher prices, but the value they provide in terms of a customized experience is unparalleled. The team goes above and beyond to craft a trek that perfectly aligns with each individual’s needs and preferences. This attention to detail ensures that every trekker can fully enjoy and make the most of their adventure.

Read more:

How to get fit for Tarsar Marsar Trek

Things to pack for Tarsar Marsar Lake Trek

Tarsar Marsar trek difficulty level

Why are we Premium? – Kashmir Great Lakes Trek

0

Introduction

The Kashmir Great Lakes Trek is a once-in-a-lifetime chance to leave with unforgettable memories. The snow-covered mountains stand tall and proud, complementing Kashmir’s natural beauty and tranquility. Treknomads aims to provide Premium and safe trekking experiences and expeditions. Premium is the key. In this blog, we will discuss our Kashmir Great Lakes premium trek and explain why we charge what we charge compared to other tour operators. This blog covers all important aspects of the pricing and how we are better e.g. transport, food, stay etc.

Transportation

You will drive down to Sonmarg and then to Sitkari post-arrival in Srinagar. Our trekkers will be provided transportation per the itinerary by NAC Vehicle Traveller to ensure the ride is safe and enjoyable. As a part of the Kashmir Great Lakes Trek itinerary, our trekkers will be traveling in clean and comfortable vehicles like Tata Sumo, Tempo Traveller, and Mini Buses – depending on the number of trekkers. We also provide private vehicles like Innova (at extra cost).

kgl trek

On day 2 of the Kashmir Great Lakes Trek, we head towards Sitkari. The main benefit is that it will help you get used to the higher altitude we will be at for the next few days. From Srinagar to Sonmarg and then to Sitkari, many beautiful places exist to stop and take pictures. You’ll see meadows, solitary woods, rivers and snow-covered mountains.

Furthermore, there are many other trek brands that don’t provide proper transportation, and charge extra throughout the trip as a traveling charge. Sometimes, they may ask you to go to a bus or taxi stand on the morning of the trek to arrange transportation. This can be inconvenient for trekkers. Treknomads may seem more expensive than other brands, but for us, the convenience and comfort of our customers is of utmost concern. Our aim is to save the trekkers from the hassle of searching for transport after reaching the airport. 

Treknomads includes all the transportation costs in our package. We have added a visit to Zoji La Pass and Zero Point, for which many other brands ask their trekkers to find or book local transport. However, additional transport incase of any mishap or emergency is not included. Any transport that is not part of the itinerary would be at an additional cost.

On top of that, our houseboat stay is included in the pricing and the trekkers can enjoy shikara ride on the Dal lake at an additional cost. A lot of other trekking brands do not provide these additional fun. Even if they do, it comes at an additional cost. We provide direct transportation to the hotel where you are staying, ensuring a more convenient and hassle-free experience. 

great kashmir lakes trek

Transportation provided by TrekNomads

  • Srinagar Airport Transfers (Pickup and Drop)
  • Free sightseeing: Zero Point and Zoji La Pass
  • Domestic Transfer 1: Srinagar to Sitkari 
  • Domestic Transfer 2: Naranag to Srinagar

Others:

  • Srinagar to Srinagar: End-to-end arrangement of Hotels, Domestic Transfers, Food (Trek Route), Porter, Permits, Contingency assistance

Excellent Meals

When it comes to food, all meals are included on camp stays. Through the trek, we provide healthy, nutritious, freshly cooked food to help you sustain the weather condition while energizing you. We provide standard vegetarian food for Breakfast, lunch, evening snacks, and dinner during trek days.

Being trekking professionals, we can fathom how important the food intake is during treks. Thus, we provide balanced nutritious meals for our trekkers. Before putting together the whole meal plan, we first look at the weather and the altitude gained. During the trek, we’ll give you healthy meals with the right amount of calories, carbs, vitamins, proteins, fiber, and minerals. Here is a detailed plan of meal inclusions on the trek:

Day Destination Meals included
1 Arrive in Srinagar Dinner at the boathouse
2 Drive from Srinagar to Sitkari/Sonamarg Breakfast at the boathouse & lunch, tea, and dinner at the campsite
3 Sitkari village to Nichnai Breakfast, lunch, tea & snacks, and dinner
4 Nichnai to the Vishansar Lake Breakfast, lunch, tea & snacks, and dinner
5 Vishansar Lake to Gadsar Lake Breakfast, lunch, tea & snacks, and dinner
6 Gadsar Lake to Mengandob/Satsar Lake Breakfast, lunch, tea & snacks, and dinner
7 Satsar Lakes to Gangbal twin lakes Breakfast, lunch, tea & snacks, and dinner
8 Rest day/Buffer Day Breakfast, lunch, tea & snacks, and dinner
9 Gangbal twin lakes to Naranag Breakfast, lunch, tea & snacks
10 Departure from Srinagar Breakfast at hotel


kgl campsite

Best quality stays

The houseboats in Srinagar’s Dal Lake don’t move like the ones in Kerala. Instead, they stay still. Some are on the edge of the lake, and others are in the middle. In Kashmir, houseboats are a popular way to live; you can see many of them at the beautiful Dal Lake. Houseboats are an excellent option for traditional hotels because they are more comfortable. On day 1, after the Shikara ride, you’ll spend the night on a houseboat on Dal Lake. They have a beautiful wooden deck and patio furniture. The sunset over Dal Lake is one of the most beautiful things in nature.
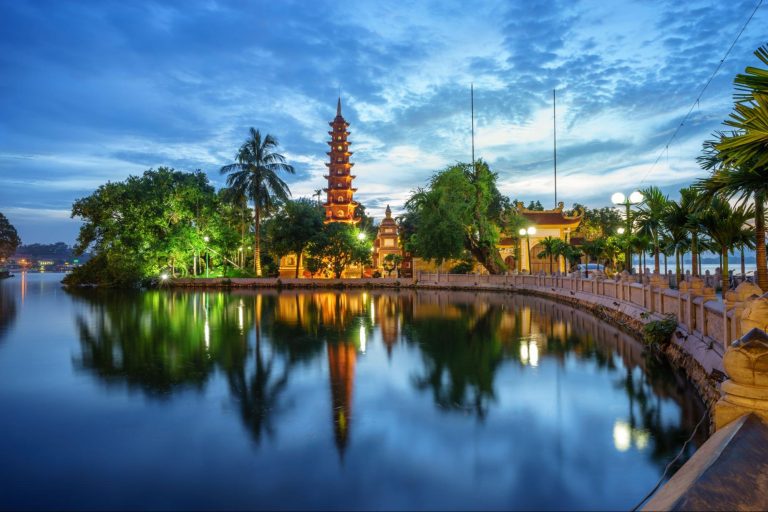
During the trek, many other tour operators put their trekkers in cheap hotels to maximize their own profits. On top of that, they will only provide very few other facilities as compared to Treknomads. Also, many trekkers often stay in groups of 6, making the room feel crowded. 

This doesn’t let the trekkers rest properly, especially at the end of a long day of strenuous trek in the woods. Our trekkers will be staying 6+1 days on Nights Camping, 1 Night: at 3/4 Star Hotel Srinagar, plus you will be staying in twin sharing rooms everywhere. (Triple sharing in case of odd group size.)

kashmir house boat

On the last day of the trek, we reach Narang Village after going down 6-7 km from the forest line. You go back to Srinagar after a relaxing time in Narang Village. You check into a hotel, shower, and chill out to prepare for the day. After a great week of trekking in Kashmir, we are returning to 3-star hotel accommodations in Srinagar. The next day, you will wake up refreshed and have breakfast before you check out and start your trip to the airport.

We make sure that our trekkers have access to all the essential facilities and amenities they need. On trekking days, we provide good tents, sleeping bags, toilet tents, kitchen tent and sitting chairs. Our kitchens are fully equipped with support staff who cook and serve fresh food. On days when the stay is in a hotel, we provide good stays in houseboats and 3-4 star hotels with breakfast included, hot shower and comfortable beds.

Other facilities are provided by TrekNomads, which other trekking companies don’t. 

Some of the facilities provided by TrekNomads – 

  • Travel insurance is part of the inclusions provided. 
  • When you trek with TrekNomads, we will provide you with porters and mules. Every trekker can have their bag, which can range from 45 to 60L and weigh up to 10 kg, carried by porters along the entire length of the trail. You can contact the trek lead to book an additional porter or mule. This is provided with an additional cost. 
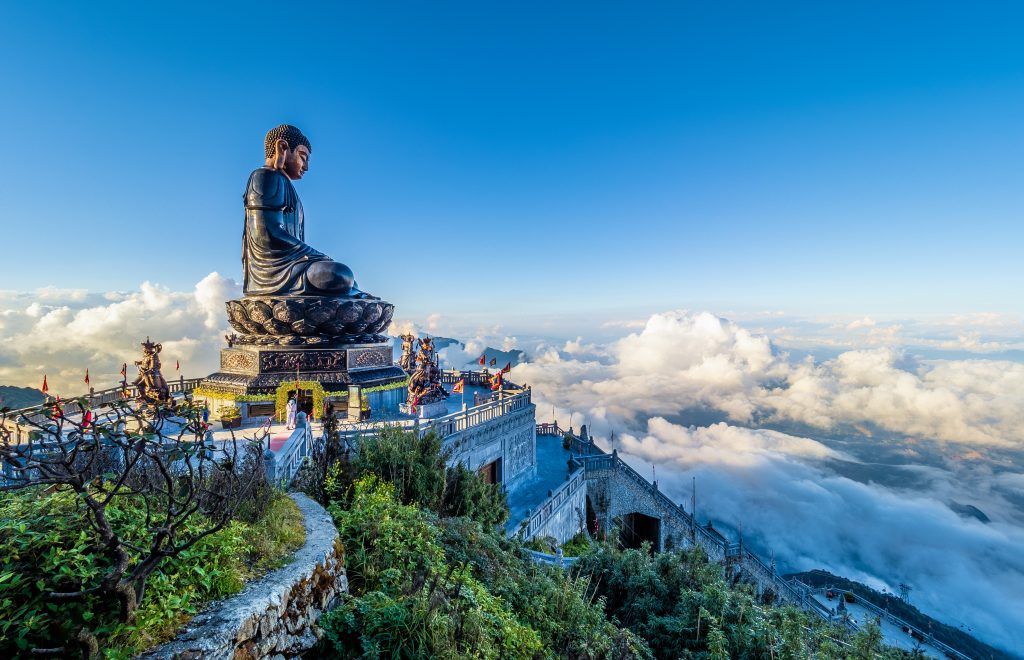
  • Our Trekkers to Guide ratio is 10:1, and you will also be provided with hot water for drinking every day. 
  • We will do medical checkups daily to ensure our trekkers stay healthy all day.
  • You will also receive a personalized T-shirt, Goodie bag, and Certificate.

Aru valley

Our KGL trek itinerary also includes these places other trekking companies don’t include in their itineraries

Visit Zoji La Pass and Zero Point.

The Zoji La, a well-known high mountain pass, separates Kashmir and Ladakh. The views from ground zero are stunning and make the trip well worth it. “Zoji La” is the name of a mountain pass as it gets a lot of snowfall. It is in the Dras area and connects the Suru Valley to the east with the Kashmir Valley to the west. The pass is on National Highway 1, which has Srinagar in the east and Leh in the west. The slopes and mountains are beautiful with their thick, velvety green spots which are ethereal and give a sense of peace. The scenery looks very different when the mountains are covered in winter snow.  

Stay In Houseboat

Hotels are quite common, yes. But TrekNomads wants your stay to be different, but having our trekkers stay in Houseboat. You shouldn’t miss the beautiful sunsets, the floating markets, or the street vendors who sell locally grown fruits and vegetables; that you will come across when staying at the houseboat. Everything about the houseboat will charm you, from the cute furniture to the beautiful surroundings. The nice caretakers and even nicer locals will make your time on the houseboat even better and more memorable.

Go for Shikara Ride (at an additional cost)

One of the most relaxing, exciting, and fun things to do in Jammu and Kashmir is to take a Shikara ride. It’s hard to find words to describe the sight of the sparkling lake water set against the stunningly beautiful mountains that circle it. We, at Treknomads, have added this in our itinerary because this amazing Shikara ride in Srinagar’s Dal Lake is definitely worth the money. Even though Shikara Ride is not a part of our package, we have included this in our itinerary at an additional cost as we know that you will always remember this ride fondly.

shikara

Conclusion

Our Treknomads, Kashmir Great Lakes Trek, costs ₹28,899 Per Person, the best price guaranteed, and is worth every penny. Even though our prices are higher than some other brand operators, we offer a more personalized itinerary that considers each trekker’s interests and physical abilities. Because of this, we put a lot of effort into ensuring each trip fits the person’s needs. Kashmir is one of the world’s most beautiful places. On the Kashmir Great Lakes Trek, we see the best mix of alpine lakes, vast meadows, high-altitude passes, and huge, untouched parts of the Kashmir Himalayas. A trek to Kashmir Great Lakes will permanently mark your heart.

Read more:

KGL trek – Best time for Kashmir great lakes trek 

Getting fit for Kashmir Great Lakes Trek

Top 6 reasons to take the Kashmir great lakes trek